Googleův generátor videí AI Veo 3 – Sen pro sběratele slopu?


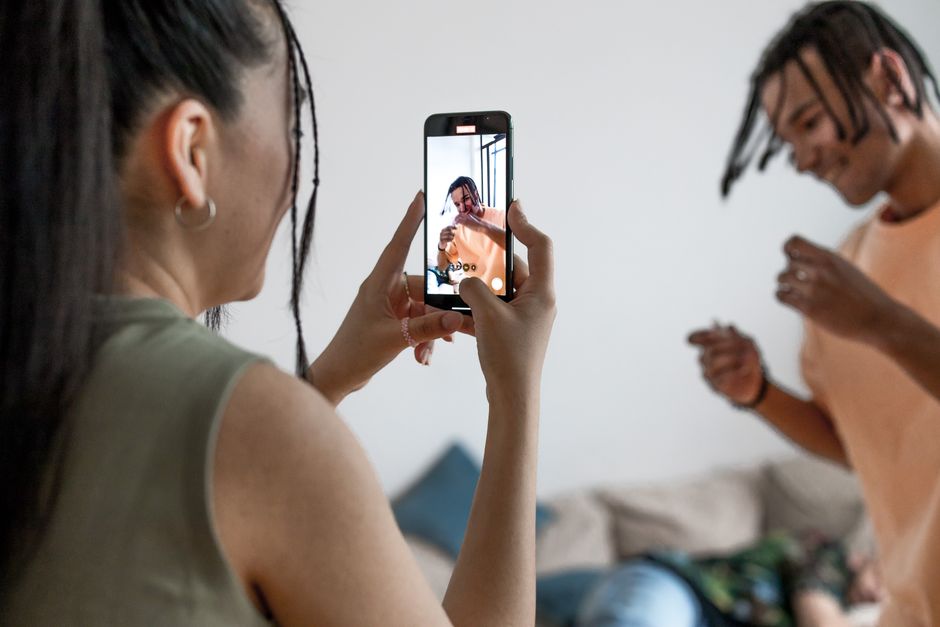
Začněte používat Veo-3 ještě dnes k přeměně surového materiálu na klipy připravené k publikování během minut. Vytvoří 60sekundový highlight basketbalového zápasu přibližně za 25–40 sekund na středně výkonném notebooku a výsledek můžete upravit několika kliky. Je to ušetřený čas pro týmy i sólové tvůrce, s potenciálem pro rychlejší obraty.
Co to dokáže jde za hranice střihů. Jeho schopnost zahrnuje automatické highlighty, titulky a označování scén a může je počítat podle typu momentu, což umožňuje rychlé shrnutí připravené k publikování. Pokud jsou klipy vydány s poznámkami k licencím, Veo-3 může připojit metadata k ochraně práv a zjednodušení kontroly.
Pracovní postup s mobilním přístupem: nahrajte z jakéhokoli telefonu a sběr surového materiálu ze střižní se stane plynulým. Pro pár střižní můžete generovat více variant paralelně, což šetří čas při jejich porovnávání. Systém zvládá časové rozpočty a automaticky vybírá nejlepší záběry, takže můžete publikovat na sociálních sítích nebo sdílet v týmové nástěnce.
Zvažte pro tvůrce: ve společnosti stále hladovějící po rychlých klipích umožňují nástroje jako Veo-3 nové formy vyprávění. Pro stand-up tvůrce nebo krátké skeče může AI generovat vtipné repliky, identifikovat pauzy pro rytmy a exportovat čisté střihy, které respektují autorská práva. Dokonce i tvůrce s vousy se může spolehnout na stejný postup a je to povědomé pro kohokoli, kdo vyrostl s nostalgií VIC-20, připomínka, že jednoduchá rozhraní mohou skrývat silný potenciál pod kapotou. Pokud máte otázku ohledně licencování, projdeme metadata, mapování práv a vydané limity před publikováním. Pár ovládacích prvků vám umožní nastavit tón, tempo a délku pro platformy jako mobil nebo stand-up klipy, přičemž udržíte rychlé tempo produkce.
Design promptů a optimalizace pracovního postupu pro Veo 3
Přijměte jediný modulární vzor promptu pro Veo 3 a otestujte ho s 5–7 variantami před škálováním. Pevné vydané pokyny udržují výstupy konzistentní, zatímco shromažďujete data z reálných testů.
Implementujte čtyřblikový prompt: instrukce role, vizuální podněty, jazyk stylu a příkazy akcí. Identifikujte centrální cíl pro každou tvorbu, pak specifikujte, kde a jak ho aplikovat. Tento přístup udržuje pracovní postup kompaktní a umožňuje rychlou iteraci napříč více aktivami pomocí společného rámce, což umožňuje vytvářet konzistentní výstupy.
Vizuální podněty pokrývají detaily vzhledu, které chcete, aby model vykreslil: design kostýmu, styl vousů, plešatost nebo delší vlasy a hudební atmosféru odpovídající scéně. Měli byste tyto prvky plně specifikovat v promptu, aby se zabránilo odchylkám, a můžete je střídat napříč aktivy při udržení stabilního jádra.
Omezení tokenů a aktiv vyžadují omezený rozpočet tokenů na prompt a cenový strop na spuštění, takže můžete efektivně batchovat testy. Používejte technické benchmarky k ověření promptů před každým spuštěním a odkazujte na estetiku TRS-80 pro retro podněty, když je to vhodné. Toto nastavení umožňuje TikTok nebo TikToky se sladit s vaším publikem a umožňuje rychlé zpětné vazby v budoucnu.
Kroky pracovního postupu: sestavte aktiva, vytvořte základní prompt, spusťte testy, identifikujte metriky, upravte prompty a uzamkněte stabilní šablonu. Zahrňte malou sadu cílových výstupů (tvorb) k porovnání a sledujte změny v logu, abyste viděli, které prompty generují požadovaný tón a tempo. Používejte přístup zaměřený na centrum, aby se zajistila konzistence napříč scénami a zabránilo se odchylkám při přidávání detailů jako délka vlasů nebo složitost kostýmu.
| Komponenta | Úryvek promptu | Poznámky |
| Role | Asistent Veo 3, klidný, užitečný, profesionální hlas | Zajišťuje základní chování |
| Vizuály | kostým: detektivní plášť; vousy: krátké; plešatost: falešná; délka: delší vlasy | Ovládá vizuální podněty |
| Jazyk | jazyk: technický, ale přístupný; tón: sebevědomý; hudební podněty | Řídí tempo a atmosféru |
| Akce | vytvořit, identifikovat, popsat; kde: střed rámu; | Specifikuje úkoly a umístění |
| Omezení | tokeny: omezené; cenový strop: střední; kadence přátelská k TikToku | Udržuje proveditelnost |
| Testy | testy: spusťte 5 variant; down-sample výsledků; výstupy připravené pro TikToky | Kontrola kvality |
| Tvorba | výstupy: 10 verzí na dávku; sledujte, které vousy nebo kostýmy fungují nejlépe | Měření a iterace |
Rychlost vykreslování a propustnost: Měření času na video
Doporučení: Benchmarkujte s pevným 60sekundovým skriptem 1080p30 a cílovým časem na video pod 2 sekundy; pro 4K30 mířte pod 6 sekund. Používejte reálný časový faktor (délka videa dělená stěnovým časem) jako primární metriku propustnosti a hlaste medián i 95. percentil, aby se zabránilo zkreslení vzácnými špičkami.
Metoda: spusťte tři skriptované scénáře na stabilním stroji: základní, drobné filtry, přidané filtry. Používejte obsah s pohybem a texturou: basketbalové klipy, kočky, křičící davy a zpěvový segment k zatížení pipeline. Zveřejněné výsledky v sdíleném dokumentu pomáhají týmům porovnávat napříč spuštěními; pokyny Google potvrzují tento přístup. Zjistili jsme, že velké scény s hustým pohybem mají tendenci prodlužovat TTV; při testování udržujte vstupy konzistentní a počítejte pokusy k oddělení odlehlých hodnot. Tato myšlenka ovlivňuje design testu. To pomáhá někomu v týmu zkontrolovat data pro zdravý rozum a porovnat napříč kohortami.
Konkrétní čísla pro 60sekundový testovací soubor 1080p30: základní TTV 1,9 s; přidané drobné filtry 2,6 s; přidané silně filtrované sekvence 4,8 s. Hodnoty reálného časového faktoru jsou 31,6x, 23,1x, 12,5x. Scéna s basketbalem a rychlými panovými záběry má tendenci rozbít očekávání a prodloužit; přidání koček nebo křiku zvyšuje texturu, kterou musí enkódér zvládnout, a pozdější přírodní záběry se mohou stát omezené pamětí. Podle těchto čísel složitost obsahu a hustota filtrů řídí delší časy.
Tipy na optimalizaci: přednačtěte aktiva a udržujte teplou mezipaměť, aby se zabránilo zpožděním studeného startu; připevněte vlákna, aby se zabránilo jitteru přepínání kontextu; minimalizujte I/O prouděním z rychlého úložiště a použitím v-paměťových bufferů; snižte počet paralelních průchodů filtrů, aby odpovídaly kapacitě GPU; používejte lehké filtry nejdříve a rezervujte těžší pro post-produkci. Udržujte opakovatelný testovací okno k porovnání výsledků v čase; to vám pomůže kalibrovat proti základu a škálovat na větší výstupy. Pro týmy působící světově poskytují tyto úpravy stabilnější propustnost během špičkových zátěží.
Výsledek: měřte TTV jako funkci rozlišení, pohybu a hustoty filtrů; hlaste absolutní časy a reálný časový faktor; nastavte cíle k zabránění špičkám latence a plánujte kapacitu. Pokud scéna rozbije očekávání v rychlém montáži, přehodnoťte cachování, správu aktiv a pořadí filtrů. S konzistentním testováním jsme vybudovali pracovní postup, který zůstává schopný pod zátěží a umožňuje plánovat pozdější přírůstky bez překvapení.
Benchmarky vizuální kvality: Rozlišení, detaily a konzistence
Doporučení: Základní 4K60 pro většinu výstupů Veo 3 k vyvážení ostrých detailů s rychlostí a snadnou editací. Pro omezenou šířku pásma nebo rychlé sociální klipy zůstává 1080p60 solidní volbou; rezervujte 8K pro masivní displeje nebo kinematografické dodávky. Pokud plánujete 8K, zajistěte 100–200 Mbps na stream a pracovní postup, který zvládne data. Noční scény a silný pohyb těží z moderování kompresních artefaktů, aby výstup zůstal koherentní napříč střihy. Pro písňové nebo zpěvové vystoupení ověřte synchronizaci rtů a udržte uznání interpretům. Tento cílený přístup slouží tvůrcům napříč žánry, včetně zpráv a televize, bez obětování vnímavé ostrosti. Dříve vydané předvolby poskytují spolehlivý výchozí bod a algoritmicky naladěné ovládání pomáhají identifikovat nejhorší artefakty v texturách vousů, detailech kostýmů nebo pohybových kočkách.
Rozlišení a upsampling
Nativní podpora zahrnuje 1080p, 4K a 8K s běžnými snímkovými rychlostmi 24, 30 a 60. Reálné bitové rychlosti na stream obvykle běží 8–12 Mbps pro 1080p60, 40–60 Mbps pro 4K60 a 100–200 Mbps pro 8K30. Algoritmicky řízené škálování z 4K na 8K zachovává hlavní linie, zatímco jemné textury jako výšivka nebo prameny vlasů se mohou zjemnit, pokud je zdroj hlučný. Pro televizní a zpravodajské záběry poskytuje 4K60 stabilní barvu a koherentní pohyb; 8K vyniká pro velké displeje, ale vyžaduje robustní úložiště a síťovou kapacitu. Příklady zahrnují rámy s vousy, texturovaným kostýmem nebo kočkami pohybujícími se přes obývací pokoj, což pomáhá hodnotit reálný výkon.
Textura, detaily a konzistence
Věrnost textur zůstává nejsilnější u 4K60 s PSNR kolem 43–46 dB a SSIM blízko 0,93–0,96 napříč typickými sekvencemi. V nočních nebo slabě osvětlených klipích mírné denoisování plus jemné zaostřování zvyšuje vnímavé detaily o 15–25 %, přičemž omezuje halosy. Pro zpěvové scény zůstává synchronizace rtů přesná do desítek milisekund ve většině klipů a barva zůstává stabilní napříč střihy, což pomáhá moderátorům při rychlých schváleních. Hledejte nejhorší artefakty kolem vysokokontrastních hran – ty odhalují, kde je potřeba další ladění. S koherentním pipeline můžete tyto problémy identifikovat brzy a upravit nastavení, což zajišťuje, že žánry zábavy, zpráv a televize vypadají konzistentně napříč rámy a osvětlením. Co přijde dál, je ladění předvoleb proti dříve testovaným záběrům, aby výsledky zůstaly předvídatelné napříč různými natáčecími podmínkami.
Audio schopnosti: Hlas vyprávění, tón a podpora jazyků
Doporučení: Používejte neutrální vyprávění Veo3 pro delší tutoriály, aby složitá data zůstala čitelná; pro události nebo stand-up sekce přepněte na energetické nebo hravé tóny k udržení energie. Vylepšete tempo po prvním průchodu, pak spusťte rychlou kontrolu, aby se potvrdilo, že načasování odpovídá vizuálům. Hotovo.
Možnosti hlasu: Veo3 nabízí několik hlasů vyprávění s odlišnými timbre. Vyberte z klidných, teplých, neutrálních, energetických, autoritativních a hravých předvoleb, pak naladěte tempo od 0,75x do 1,5x a upravte důraz na klíčové fráze. To pomáhá čtenáři cítit se podobně jako živý prezentér a testy napříč vzorovými klipy ukazují, že hlas zůstává jasný, i když se věty protáhnou přes fotky nebo slidy.
Tón a kadence: Posuvník tónu vám umožní nastavit náladu bez změny hlasu. Pro foto-těžký průvodce udržujte neutrální základ a přidejte krátké důrazové výbuchy po číslech nebo událostech. Pro vtip vložte krátký hravý rytmus a nechte vyprávění dýchat. Skepticismus ohledně AI vyprávění existuje, ale funkce jsou přímé, vyzkoušené a testované napříč mnoha kontexty, což vede k konzistentním výsledkům i u delších klipů.
Podpora jazyků: Veo3 automaticky detekuje jazyk skriptu a může poskytovat lokalizované hlasy napříč jazyky. Podporuje angličtinu, španělštinu, francouzštinu, němčinu, portugalštinu, italštinu, japonštinu, korejštinu, mandarinštinu, nizozemštinu a další, s regionálními variantami, kde je to dostupné. Pro obrovský plán spojující globální show můžete vytvořit jediný skript a generovat kompletní vícejazyčné verze bez přenahrávání. Veo3 umožňuje překladově přátelský rámec pro více než tucet trhů, což usnadňuje dosažení různorodého publika.
Pracovní postup kvality: Začněte s 15–20sekundovým testovacím klipem k porovnání hlasů na normálním obsahu a podobných scénách. Identifikujte špatnou výslovnost nebo nepřirozené tempo a upravte klíče výslovnosti. Pokud máte foto-těžký segment, zkuste klidný s měřenými pauzami; pokud chcete energii pro události, přepněte na energetický pro ty sekce. Benj poznamenal, že rychlý leštící průchod zachytí hraniční případy a pomůže věci cítit se lidsky spíše než roboticky, a řekl, že to stojí za iteraci, dokud nebudete spokojeni. Testy napříč delšími běhy ukazují konzistentní výsledky, snadno upravitelné pro delší, kompletní videa.
Politika a opatrnosti: Některé kontexty varují před syntetickým vyprávěním v citlivých nebo regulačních nastaveních; určité platformy zakazují AI hlasy v specifických reklamách nebo oznámeních. Vždy označte, že hlas je generován AI, když je to vyžadováno, a plánujte show, které vyžadují transparentnost. Musíte vyvážit humor s jasností: dobře umístěný stand-up tón může zasáhnout vtip bez rušení zprávy. Obrovský potenciál Veo3 září, když identifikujete správnou směs hlasu, tónu a jazyka pro vaše publikum, což vám pomůže oživit váš plán show, které působí přirozeně a přístupně.
Branding, stylování a úpravy post-produkce v Veo 3
Vytvořte branding kit v Veo 3: pevnou paletu barev, překryv loga a typografii, pak je aplikujte napříč každou scénou. Nejprve naplánujte svůj přístup; editor zajišťuje konzistenci napříč scénami a pomáhá dosáhnout koherentního vzhledu. Udržujte náladu uzemněnou, protože vyhnutí se strašidelným vibracím vyžaduje stabilní osvětlení a jasnou barevnou cestu. Tým věřil, že tento přístup zachovává realitu a zdrojový materiál.
Branding kit a vizuální identita
- Naplánujte základní paletu s primárními, sekundárními a neutrálními tóny k udržení čitelnosti v titulech a překryvech.
- Vytvořte překryvy loga a vodoznak, který zůstane na stejném místě v každé scéně.
- Definujte typografii: vyberte dvě tloušťky pro nadpisy a tělo textu; nastavte výšku řádků pro čitelnost.
- Testujte s modely Benj a Whitwam k ověření osvětlení, tónů kůže a celkové barevné rovnováhy; zkuste jiný model, pokud se výsledky liší.
- Přidejte UI podnět ve stylu VIC-20 a retro rám k sjednocení vizuálů; znovu používejte napříč scénami k posílení brandingu.
- Inkorporujte jemné akcenty tamburínu během přechodů k signalizaci tempa, úsvitových momentů a sladění se písní – udržujte to vkusné.
- Omezte glitche na záměrné momenty u střihů; jinak přepněte na čisté přechody, aby se zabránilo rušení.
- Udržujte zdroj a realitu konzistentní s brandingovým plánem, aby se zabránilo trhavým posunům mezi scénami.
Úpravy post-produkce a sladění audia
- Synchronizujte VO a okolní zvuk s beatem; udržujte střihy sladěné s jednoduchou rytmickou mapou pro čitelnost.
- Barvově gradujte jemně k zachování brandingové palety a přirozených tónů napříč scénami.
- Odstraňte zbytečný šum a vyhněte se přepracování; jemná textura může zlepšit realismus bez hádání nálady.
- Udržujte stabilní vizuální tempo napříč scénami; používejte přechody, které respektují tempo editora a limity systému.
- Testujte napříč více scénami k zajištění konzistence; pokud se objeví posun barvy, vraťte se k základnímu gradování a aplikujte stejný LUT.
- Exportujte minimální verzi s vodoznakem pro kontrolu a neoznačenou verzi pro finální dodávku; dokumentujte jakékoli změny v poznámkách k zdroji.
Tým věřil, že konzistentní branding zajišťuje rychlejší rozpoznání a udržuje realitu sladěnou se zdrojovým materiálem.
Práva, licencování a vlastnictví obsahu generovaných klipů
Definujte vlastnictví a licencování předem v závazné dohodě před generováním jakéhokoli klipu: vlastníte produkovaný materiál a edity, zatímco platforma si zachovává vlastnictví podkladových modelů a tréninkových dat; udělte širokou, přenositelnou licenci k jejich použití, reprodukci, úpravě a sdílení výstupů, ať už pro komerční kampaně nebo osobní projekty. Vysvětlete, zda práva se rozšiřují na downstream distribuci, a zajistěte, aby licence byla kompletní, věčná, celosvětová a sublicencovatelná. Tento přístup udržuje vaše práva jasné a vyhýbá se představě, že práva na obsah jsou pouze implikovaná. Používejte osm licencováních bloků k organizaci politiky: vlastnictví výstupů, přístup k modelu, provenience tréninkových dat, derivativní díla, distribuční práva, vymáhání, retence dat a ukončení. Postup akce by měl být konkrétní, s explicitními podmínkami pro noční nasazení a skupinovou spolupráci, se zaměřením na pravdu a spravedlnost. Více ovládání snižuje riziko a bloky zajišťují, že je můžete použít downstream, což pohání tvorbu spíše než zmatení. Pokud obsah zahrnuje kostýmové postavy nebo značky, specifikujte schválení za scénami. Viděli jsme, že tento přístup pomáhá TikTokers, americkým tvůrcům a dalším pochopit, co jste vytvořili, znovu a znovu, a co můžete použít k tvorbě nových klipů.
Tréninková data, zdrojový materiál a provenience
Přijali jsme politiku zdroje nejdříve, která dokumentuje, odkud tréninková data pocházejí a jak se obsah používá k tréninku modelů; použití tréninkových dat může zahrnovat licencovaný materiál, veřejné zdroje a uživatelem poskytnuté vstupy. Pokud klip používá obsah od TikTokers nebo jiných tvůrců, zajistěte potřebné licence k jejich podobě a dílům; dodržujte zákony o soukromí a publicity, zejména pro americké publikum. Systém připojuje proveniencí data k každému klipu, ukazující zdroj a cestu, jak model vytvořil výsledek; to pomáhá s žádostmi o stažení nebo odstranění obsahu. Pro obsah s kostýmy, značkami nebo rozpoznatelnými postavami ověřte práva za scénami, aby se zabránilo porušení práv. Pokud chcete znovu použít obsah v budoucím tréninku nebo k tvorbě nových klipů, udržujte auditní stopu a zajistěte, aby souhlas byl zachycen; to podporuje transparentnost a umožňuje vám zpracovávat žádosti znovu a znovu.
Případ použití a konkurenční vhodnost: Volba Veo 3 před alternativami
Doporučení: vyberte Veo-3 pro týmy, které potřebují spolehlivou, konfigurovatelnou generaci videí AI, protože kombinuje praktickou bezpečnost, rychlou iteraci a čistou integraci do existujících pracovních postupů. Umožňuje rychlé prototypování při udržení ovladatelných a audito vatelných výstupů, což snižuje riziko ve srovnání s neprůhlednějšími modely. Ačkoli někteří konkurenti tvrdí širší schopnosti, schopnost Veo-3 dodat realistické výsledky s jasnými zábranami ji činí silnou volbou pro desetiletou roadmapu. S ohledem na riziko spusťte 4týdenní pilot k validaci kvality výstupů a bezpečnosti obsahu, bez uzamknutí dlouhodobého závazku. V rámci firmy hodnotící možnosti proti OpenAI a DeepMind Veo-3 demonstruje zázemí v fitness systému a tréninkových pipelinech, což pomáhá minimalizovat zkazlé výsledky a udržovat stabilní základnu.
Klíčové případy použití
Běžné použití zahrnuje sestavování scén, titulek a dabing, s řadou variant pro marketing, školení a produktové dema. S ohledem na povahu výstupů poskytují základní nástroje realistické překryvy, automatické barvové gradování a zarovnání textu, které zůstávají v rámci brandingových pokynů. Rozhodovací stromy podporují kontextovou selekci rámů a scén, což snižuje potřebu manuálních editací. Bez obětování rychlosti mohou týmy nasadit v disciplínovaném pracovním postupu, který zahrnuje kontroly nenávistných projevů a governance obsahu k ochraně před nebezpečným materiálem. Generování dat na pozadí a exporty analýz se stávají rutinou, což umožňuje týmům měřit fitness proti cílovým KPI. Logika založená na stromech pomáhá udržovat obsah koherentní, zatímco modulární systém umožňuje týmům vyměňovat nové nástroje, jak se potřeby vyvíjejí, a posouvat se za jednoduché šablony.
Hloubka případu použití se škáluje s dostupností dat: velký katalog těží z hromadné generace, zatímco menší projekt získává zaměřením na vysoce signálové scény. Základní titulky, sladění hlasu a přechody scén lze automatizovat, přičemž editoři si udržují kontrolu v konfigurovatelném UI. Tato rovnováha činí Veo-3 praktickou pro produkční studia i interní týmy hledající rozšíření schopností bez přepracování existujících pipeline.
Konkurenční vhodnost a tipy na implementaci
Ve srovnání s alternativami nabízí Veo-3 jasnější cestu od výzkumu na pozadí k živé produkci, se zaměřením na stabilitu systému a předvídatelné tréninkové smyčky. Při benchmarkování proti OpenAI a DeepMind hodnotěte nejen špičkové schopnosti, ale i integrační cíle, monitorovací háky a zábrany. S konzervativním postoje k riziku upřednostněte fázi rollout: začněte se základním pipeline, pak přidejte funkce nad základnu, jak roste důvěra. Pro nasazení zůstává rámec po rámci vyhodnocení nezbytný k brzkému zachycení zkazlých výstupů a ladění promptu a parametrů modelu. Proti pevnému termínu využijte malý počet šablon připravených k produkci a škálujte, jak validujete fitness každé šablony. Tréninkové rutiny by měly zdůrazňovat vyváženou směs syntetických dat a reálných vzorků, což zlepšuje robustnost modelu v kontrolovaném prostředí. Logování na pozadí, systémové upozornění a audito vatelná historie změn udržují týmy sladěné, snižují odchylky a zajišťují soulad. Směrování obsahu založené na stromech pomáhá udržovat konzistenci napříč scénami, zatímco modulární sada nástrojů podporuje rychlou experimentaci bez přestavby jádra pracovního postupu.
📚 Více o tvorbě videí
- Veo 3 - Ultimátní komplexní průvodce novým generátorem videí AI od Google
- Google DeepMind Veo - Generátor videí AI se synchronizovaným audiem, který mění filmový průmysl
- Co je Veo 3? Nový model videí AI od Google by mohl zničit Hollywood
- Jak vytvořit efektivní prompty pro Video AI Veo 3 od Google - Praktický průvodce
- Veo 3 AI API - Vysokokvalitní tvorba videí s nejnovější technologií Google
Ready to leverage AI for your business?
Book a free strategy call — no strings attached.


