Free Google Veo 3 AI Video Generator with Native Audio


Start now: generate a video for free using text-to-video with native audio. Veo 3 by Google processes your prompt into motion, turning ideas into scenes faster and keeping the workflow comfy for beginners and pros alike. If you need a quick demo, paste a short script and watch a ready-made clip emerge in minutes, ready to share and refine.
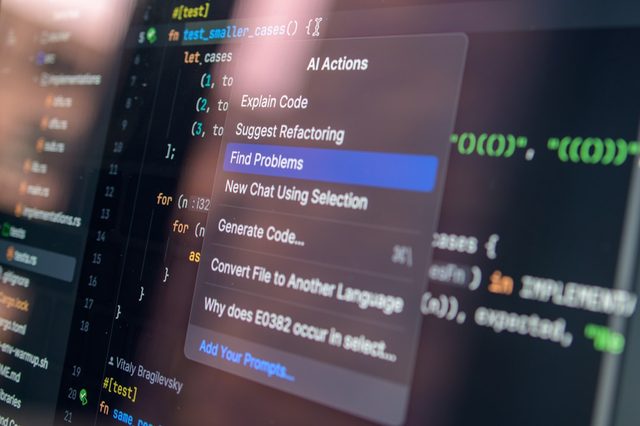
This guide explains how advancements in AI video generation map prompts into scenes. Outputs are compared across variations to show how the engine interprets intent. To understand how prompts map to frames, run small tests and compare results. It sets expectations about limits and reliability. Prepare a few questions about pacing, voice, and style to evaluate results as you test the tool.
Veo 3 supports native audio, so you can go from idea to finished video with minimal steps. Try a soft background track and a short narration to see how audio tracks align with visuals in dynamic scenes. The process stays comfy, but be mindful of misuse of voice or branding and build trust with your audience by clearly labeling generated content.
Use imagen-style cues in prompts to guide visuals quickly. The tool remains accessible to creators with varied experience, offering presets and a straightforward guide to get started. If you’re unsure, begin with short, focused clips and iterate to keep outcomes dynamic.
Quick start steps: sign in, choose a free Veo 3 option, enter a concise script, select a style, and generate. Review results, tweak pacing and audio, then regenerate. This approach helps stay within limits and answer common questions about quality and speed. When you compare results with different prompts, you’ll notice how advancements in AI video tools shrink the distance between idea and production.
Access and eligibility: how to sign up for the Free Veo 3 tool and start creating
Sign up now on the Free Veo 3 page: create your account with a valid email, set a password, and complete verification. The process takes about two minutes and unlocks native audio generation and access to promptusai-powered templates, letting you move from idea to captivating motion quickly. Once you’re signed in, you can download sample projects to understand the workflow and preview professional-quality results.
Eligibility and requirements
To access Free Veo 3, you need a valid email and agreement to the platform terms, with your account operating in a supported region. The environment is designed for user-friendly interaction within your Veo workspace, where your assets stay attached to your account. The core features include models, text prompts, and processing that turn input into video output, with authentic audio generated natively. You will see the impact as you adjust boundaries for safety and compatibility, while promptusai templates and imagen integrations help you tailor the look and feel to your audience. The system provides stability and is providing reliable performance across devices.
Steps to sign up and begin creating
Visit the Free Veo 3 sign-up flow and enter your email, then create a password and complete the verification. In the dashboard, select a template or start from text prompts; choose native audio handling to ensure authentic sound. Input your text and prompts; the technology runs processing through a set of models that translate ideas into motion. Preview the result, tweak parameters, and stay within boundaries to comply with guidelines. When ready, download the video and share – you’ll see captivating results and rising popularity for your content.
Native Audio capabilities: supported languages, voice options, and lip-sync performance
Enable native audio with multilingual support and pick a voice that matches your character to ensure precise lip-sync from the first render. The system supports 40+ languages with 60+ voice profiles, including English (US/UK), Spanish (LATAM and Spain), French, German, Italian, Portuguese (BR/PT), Dutch, Japanese, Korean, Mandarin, Hindi, Arabic, Turkish, Russian, Indonesian, Vietnamese, Thai, and Polish. Imagen-based phoneme timing anchors mouth shapes to speech, helping real-time alignment across scenes on YouTube and other platforms.
Voice options: choose from multiple voice families–neutral, warm, bright, deep, and energetic–plus regional accents and gender variants. Each profile adapts by tempo, intensity, and expressiveness, with fine-tuning available for pitch, speed, and emphasis. Moderation controls let you constrain languages and voice styles per project, keeping output aligned with your brand while expanding reach to shared audiences across platforms.
Lip-sync performance: dynamic lip-sync uses phoneme-aware timing to synchronize jaw movements with spoken content, delivering natural mouth movements and facial cues while maintaining stable jaw lines during rapid dialogue. You can switch to a static setting for test renders or quick previews, then move to fully dynamic movements for longer takes. The system supports full-face alignment options and soft boundaries that prevent exaggerated gestures, ensuring believable results even in dense dialogue scenes.
Practical tips: provide clean, noise-free audio, reference phrases with clear articulation, and keep scripts within natural pacing. For higher fidelity, run trials with short clips first and adjust voice warmth or accent to fit the character. This approach reduces reruns and supports collaborative reviews, where teammates can mark changes directly in the project and share notes without friction.
Platform and workflow: outputs can be downloaded in common formats for seamless integration into your generator pipeline, then uploaded to YouTube or other channels. The flexible system supports full-scale campaigns or free trials to test multiple voices and languages before committing, with moderation workflows guiding revisions. You’ll find detailed settings for static vs dynamic movements, while the shared assets remain accessible to team members, enabling comfy collaboration across devices and ecosystems.
Workflow basics: script import, auto-voice generation, and exporting your first video
Enter your script in the editor and click Import to auto-create scenes. The import step maps beats to visuals and aligns timing, so you begin with a clean, cinematic skeleton rather than recreating each frame. It also defines the shared details you can tweak later for a professional-quality result.
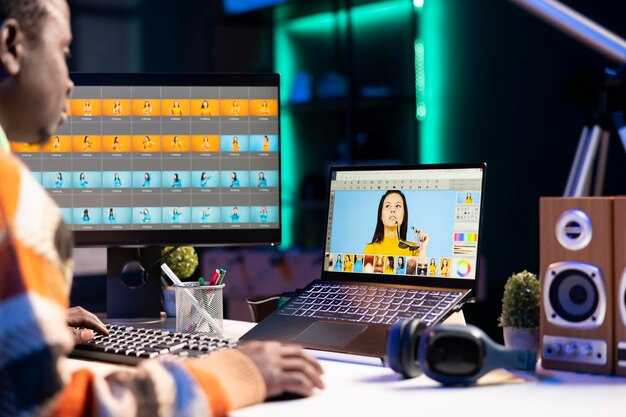
Choose a voice for auto-voice generation with veo3bot: pick a Gemini-based voice or a custom setup. Adjust speed, pitch, and emphasis to fit their professional-friendly tone. If you want native audio, enable the language options. You can also switch to gemini mode for faster tempo. The platform uses a shared promptus library to generate natural speech and syncs with your script's details. The result is professional-quality audio that fits your teaching demos.
Review the generated narration, then add visuals with images, captions, and on-screen prompts. Then click Export to start the render. The engine democratizes creation by letting seasoned creators and newcomers alike produce content without external studios. Then export options let you pick MP4, MOV, or WebM, with settings for resolution, bitrate, and frame rate. Ensure your restrictions (audio length, total file size) are respected for platforms where you plan to publish. The final file keeps a cinematic edge with clean transitions.
This workflow supports your shared assets, letting you import scripts from teaching notes, reuse templates, and keep a comfy pace during production. The veo3bot engine uses gemini and imagen to craft visuals and voice, and it seamlessly exports your first video for platforms like YouTube. If you want to refine tone or add details, adjust the promptus prompts and re-export. The result is a quick, professional-quality video that demonstrates impact and uses detailed prompts to align with your content goals.
Templates and presets: formats and use cases for marketing, education, and social media
Choose platform-aligned templates: start with a 16:9 output for marketing decks, switch to 9:16 for stories, and adapt 1:1 for grid posts.
Templates cover formats across marketing, education, and social media. The library offers various presets that you can customize easily with the veo3bot to ensure synchronized audio and visuals, while keeping brand style intact. Collaborative workflows, integrated assets, and clear credit tracking become the backbone of scalable campaigns.
- Formats and outputs
- 16:9 (1920x1080) for product demos, case studies, and long-form ads
- 9:16 (1080x1920) for Reels, Shorts, and immersive stories
- 1:1 (1080x1080) for feed posts, carousels, and quick tutorials
- Templates and presets
- various scene packs with synchronized visual effects and ambient audio to match a product, education, or lifestyle niche
- styles such as clean corporate, active lifestyle, technical explainer, and minimal branding to meet diverse needs
- collaborative presets for teams, including caption overlays, logo placement, and portfolio-ready thumbnails
- unlimited variations that adapt to different audience needs without creating new assets from scratch
- forms of content such as tutorials, demos, testimonials, and quick tips all configurable from a single template
- Asset management and credit
- credit controls ensure compliant use of stock assets and licensed media
- integration with your CMS or LMS simplifies publishing and versioning
Marketing templates: practical formats and workflows
- Product launch packs: 15–30 second teasers in 16:9, with a follow-up 30–45 second feature clip in 1:1 to drive cross-posts
- Ad sequences: a 3-4 frame micro-story that can be output as a vertical 9:16 reel or horizontal 16:9 ad, easily synchronized with voiceover
- Brand storytelling: ambient soundscapes that underscore the tone, plus lower-third styles to reinforce key messages
Education templates: teaching-focused formats
- Lesson intros: 10–20 seconds in 16:9 with a clear problem statement and a call-to-action for learners
- Explainers: 60–90 seconds in 16:9 or 9:16, using a step-by-step visual form and on-screen highlights
- Tutorial series: modular segments that can be reassembled as short clips or a longer course preview, ensuring continuity across clips
Social media templates: formats for engagement
- Reels and Shorts: punchy 9:16 clips with synchronized captions and ambient audio cues to boost watch-through rates
- Carousel promos: a sequence of 1:1 panels that tell a story, with consistent style and transitions
- Community prompts: collaborative templates inviting user feedback, with branded frames and easily swap-able images
Practical guidelines and tips
- Start from a single template family and adapt across formats to maintain a consistent visual identity
- Assign a dedicated style, image palette, and font set to underscore brand recognition
- Use veo3bot to explore variations quickly, then lock in a preferred version for all channels
- Keep length and cadence aligned with platform limits; adjust ambient audio and voiceover to match the tempo
- Monitor output quality and integrate assets smoothly to prevent lag between scenes
Creations become scalable when you map needs to formats, then apply presets that cover multiple forms of content. The templates support the product and teaching goals by enabling quick exploration, ensuring consistent style, and providing a collaborative workflow that accelerates production. Output remains flexible across channels, while maintaining a clear, professional look that reinforces brand identity.
Quality and pacing adjustments: fine-tuning visuals, audio levels, and scene transitions
Start with a baseline: export 1080p at 24fps, set the master audio to -3 dB and dialogue around -6 dB, then run auto-normalize. Have veo3bot review the first 15 seconds and propose subtle tweaks to color and balance for many devices in a digital classroom.
Visuals stay readable when you lock a single grade across shots. Use stable white balance, consistent exposure, and controlled contrast; apply sharpening sparingly to avoid halos on close-ups. When you work with images, keep a unified look and let ai-driven refinements from imagen fine-tune skin tones, skies, and textures. This approach democratizes tech by letting teachers publish polished content without deep editing skills, which is ideal for education and school projects, and it keeps output forms consistent for viewers.
Pacing matters. Keep short segments for key ideas, aiming for 3–6 seconds per idea in school videos, with a quiet breath between topics. Each cut stands on the idea it introduces and should flow into the next without jarring the viewer. Use cross-fades or subtle dip-to-black transitions to maintain rhythm across scenes.
Audio and transitions ahead: keep narration clear by matching voice levels with background music; apply a gentle compressor so voices stay readable when scenes enter or exit. Prefer smooth transitions: cross-fade durations of 0.4–0.8 seconds; avoid abrupt cuts on sensitive material that could distract learners. This setup helps output to feel cohesive for viewers of many backgrounds and devices.
For education use, ensure the final output forms a cohesive sequence that can be uploaded to school portals or streaming platforms; this keeps veo3bot outputs accessible to teachers and students alike. The approach spreads knowledge and supports educators who want to publish polished lessons without specialized editing skills, enabling many courses to grow from a single, well-timed video.
| Area | Recommended setting | Rationale |
|---|---|---|
| Visuals: color and exposure | Neutral grade; steady white balance; mild saturation | Consistent read across devices |
| Audio: dialogue and mix | Dialogue -6 dB; master -3 dB; music -18 dB | Clear speech with room for ambience |
| Transitions | Cross-fade 0.4–0.8 seconds | Smooth pacing between ideas |
| Length and pacing | Short segments 3–6 seconds; pauses between topics | Supports comprehension and memory |
| Output contexts | 1080p, 24–30fps | Works for school portals and many screens |
Measuring impact: engagement metrics and best practices to boost viewer retention
Set a fixed target and monitor three core measures: average view duration (as a share of total video length), retention at critical moments, and clip completion rate. These measures give you a clear answer about where viewers stay or drop, which enables targeted improvements. On youtube, apply the same standards for all clips to keep the data consistent across the channel.
Data structure and pipelines
Collect those details into a single dashboard, and ensure data integrity by keeping timestamps synchronized across devices and clips. Use simple workflows that move from capture to analytics without friction; this keeps your annotations, clips, and metadata aligned.
Design the content with dynamic pacing: blend longer scenes with concise clips and synchronized audio cues to hold attention. Use a detailed storyboard for those moments that most often drive engagement.
Trust comes from transparent signals and a consistent focus across uploads. Use workflows that loop high-performing formats into new content. The sora AI layer enables this by scoring scenes and suggesting edits.
Implementation plan follows a step-by-step workflow: step 1 – capture metrics during post, step 2 – validate data, step 3 – score scenes, step 4 – test tempo and clip lengths, step 5 – publish a test set and compare results with baseline to quantify progress.
Focus on those audiences who stay through the video and adapt the opening for them. In the video ecosystem, begin with a tight opening, then deliver value within the first 30 seconds to raise the odds viewers continue into the next clip. Use insights from different schools of practice to tailor pacing for your audience. In addition, analyze user behavior signals to tailor openings for different segments, and ensure you provide details that are actionable into the workflow, while maintaining trust by providing consistent, measurable signals across clips.
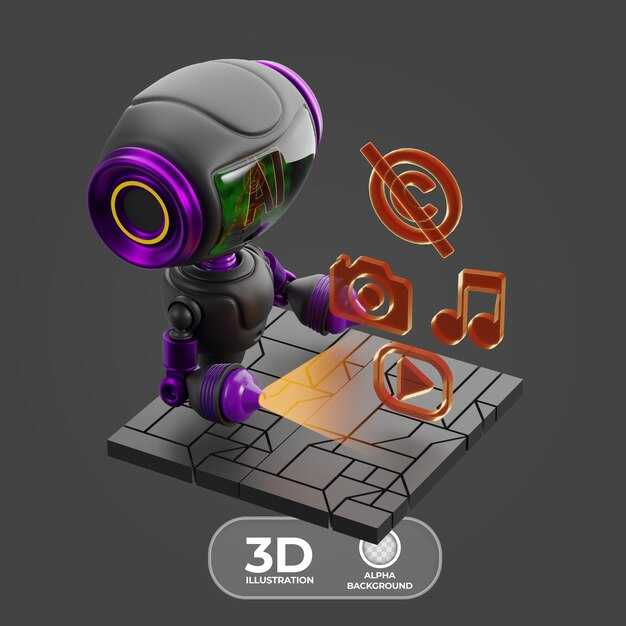
Copyright, permissions, and privacy: ownership rights and usage boundaries for generated content
Always secure clear ownership by documenting who owns the finished video and all assets included in it. Verify you hold rights to your inputs and that the output does not infringe third-party copyrights.
Copyright for produced content typically sits with the creator who writes the prompts and assembles the final cut, while the tool provider retains rights to the underlying model and any bundled media. Check the terms of service and the license that comes with the suite, including promptusai generators, to know what is allowed across commercial uses, edits, and distribution. Keep a full record of licenses for any stock sounds, images, motion assets you include; this makes it easier to defend boundaries if someone asks for proof.
Permissions: If you use licensed sounds or images, you must include permission or a license; do not rely on the tool to grant those rights automatically. The generated output may still contain life-like visuals or sounds that resemble real people or places; ensure you have consent if those are identifiable. When you plan a release, consider adding a credit line or text overlay that clarifies the source rights.
Privacy: Review how inputs are handled and whether they are stored to improve models. Adjust retention settings and disable cloud storage if allowed. Do not upload personal data or clear identifiers of real individuals without consent; anonymize prompts or use fictional examples when demonstrating capabilities, such as a strawberry-themed storyboard.
Boundaries and usage: The output is usable across daily projects, but you still cannot misrepresent content or violate terms. Do not export or sell assets you do not own or have rights to use. If the platform requires attribution or imposes licensing limits, follow those rules. When depicting real people, secure explicit consent and respect rights to publicity across jurisdictions. The tool stands as a generator that makes it easier to create, but you must respect limits on how you apply the outputs, especially in advertising or political contexts.
Step-by-step checklist: Step 1, read the terms, privacy policy, and stock asset licenses for your generator suite (including promptusai). Step 2, document ownership and keep a finished copy of each license. Step 3, for any person depicted, obtain consent or use clearly fictional representations. Step 4, add a visible note on ownership and licensing in the project. Step 5, store prompts and assets securely and avoid sharing private data. Step 6, review permissions as policies update to stay compliant.
📚 More on Video Creation
- Google DeepMind Veo - AI Video Generator with Synchronized Audio That Changes the Film Industry
- Google Veo 3 - Altering AI Video Creation with Constructed-in Audio
- Google Veo 3 - Unleashing Creativity with the Ultimate AI Video Generator
- Google Launches Veo 3 AI Video Generator for Gemini Pro Subscribers
- Google Unveils Veo 3 AI Video Generator
Related Articles
tags
subscribe
Stay in the loop
Get new articles on AI, growth, and B2B strategy — no noise.