Wie man Videoclips mit Sound unter Verwendung von Veo 3 in Google Vids generiert – Schritt-für-Schritt-Anleitung

Konfigurieren Sie Veo 3 in Googles Vids, um generieren einen mit Sound aktivierten Clip in 1080p60 zu erzeugen und als kostenloses MP4 zu exportieren. Diese Essentials etablieren einen zuverlässigen Workflow von Anfang an.
Organisieren Sie Assets in einem reibungslosen Workflow: Importieren Sie Aufnahmen von der Kamera, wenden Sie Vorlagen an und bauen Sie eine Master-Sequenz auf, die mit Ihrem Plan für Live-Aufnahmen übereinstimmt. Der Kopf bleibt fokussiert, da jeder Schritt geplant ist.
Sperren Sie den Audio auf der Timeline bei 48 kHz, platzieren Sie ihn unter den Visuals und verwenden Sie kostenlose Sound-Pakete, um Lücken zu füllen; überprüfen Sie die Pegel in einem schnellen Test-Render. Live-Überprüfungen helfen Ihnen, Probleme früh zu erkennen und das Projekt ernst zu halten.
Speichern Sie Ihre Einstellungen als wiederverwendbares Master-Preset und wenden Sie es auf kommende Projekte der nächsten Woche an, um den Rhythmus konsistent zu halten. Diese Vorlagen rationalisieren die Produktion und halten Ihr Team ausgerichtet und den Workflow reibungslos.
In Demonstrationen präsentieren Sie Charaktere wie eine Frau-Roboterin, um Tempo, Untertitel und Stimmausrichtung zu validieren; sagt die Anleitung, dass Sie effizienter generieren können, indem Sie nach jeder Live-Überprüfung iterieren. Wenn Sie veröffentlichen, sind Sie wieder im Prozess und wissen, was Sie für die nächste Woche anpassen müssen.
Veo 3-Projekt für Google Vids konfigurieren: Auflösung, Bildrate und Audio-Samplingleistung
Stellen Sie das Veo 3-Projekt auf 1920x1080, 30fps und 48kHz Stereo ein, um saubere Klänge und zuverlässige Wiedergabe in Google Vids zu gewährleisten. Diese Starter-Einrichtung bietet genug Spielraum für Bearbeitungen, Untertitel und grundlegende Farbarbeit, während die Dateigrößen vorhersehbar bleiben und Ihr Konto für eine einfache Nachverfolgung von Änderungen organisiert wird.
Für clips mit viel Bewegung ziehen Sie 1920x1080 bei 60fps in Betracht, um die Bewegung flüssig zu halten und Bewegungsunschärfe zu reduzieren. Das funktioniert normalerweise gut für dynamische Dialoge und Action-Momente, und Sie können die höhere Bildrate nutzen, um das Tracking zu erleichtern und den Eindruck zu erzeugen, dass das Video natürlich wirkt. Wenn Sie ein sanfteres, filmischeres Tempo anstreben, können Sie auch mit 30fps beginnen und später je nach Shot-Komposition wechseln.
Die Audio-Einrichtung ist genauso wichtig wie das Bild. Stellen Sie die Audio-Samplingleistung auf 48kHz ein und verwenden Sie Stereo-Kanäle. Das gibt Ihnen klare Klänge und ausgewogenen Sound über die Lautsprecher, was den Dialog lebendig wirken lässt. In Veo 3 wählen Sie 2-Kanal-Stereo im Setup-Menü, um den Mix sanft und freundlich für die meisten Zuhörer zu halten, insbesondere wenn die Bewegung im Bild mehrere Stimmen beinhaltet.
In Szenen mit schwachem Licht kann Körnung auftreten und die Klarheit beeinträchtigen. Wenn Sie Körnung sehen, erhöhen Sie nicht die ISO; behalten Sie stattdessen die 48kHz/Stereo-Einstellungen bei und korrigieren Sie die Belichtung im Post-Produktionsprozess. Eine leichte Berührung bei der Rauschunterdrückung reicht aus, um die natürliche Textur zu erhalten, während ein matschiges Gefühl vermieden wird, das den Anfang des Dialogs und die wahrgenommene Qualität beeinflussen könnte. Diese Funktionen werden Ihnen in einem Starter-Szenario gute Dienste leisten und Raum für spätere Anpassungen lassen, ohne die Kernaufnahme zu kompromittieren.
Speichern Sie diese Konfiguration als Ihre grundlegende Einrichtung in Ihrem Konto, damit Sie diese Entscheidungen für jedes Projekt nicht neu überdenken müssen. Sie gibt Ihnen eine konsistente Grundlage, hilft Ihnen, auf Kurs zu bleiben, und macht es einfach, einen zuverlässigen Veo 3-Workflow im Team zu verteilen. Für eine schnelle Referenz können Sie eine einfache Notiz oder einen Newsletter mit Ihrer talentierten Crew teilen – sie werden Ihnen für den stabilen Halt und die klaren Haken danken, die alle ausgerichtet halten.
Schnappschuss der Schnelleinstellungen
Auflösung: 1920x1080; Bildrate: 30fps (60fps für clips mit viel Bewegung); Audio-Samplingleistung: 48kHz; Kanäle: Stereo. Diese Schritte spiegeln den Kopf einer reibungslosen, freundlichen und effektiven Einrichtung wider, die für die meisten Anfängerprojekte in Veo 3 funktioniert. Der Geist hinter dem Prozess wird das sanfte Gleichgewicht zwischen Qualität und Dateigröße schätzen, sowie den Anfang einer dauerhaften Routine, die gute Praktiken und einfache Anpassungen in der Zukunft umarmt.
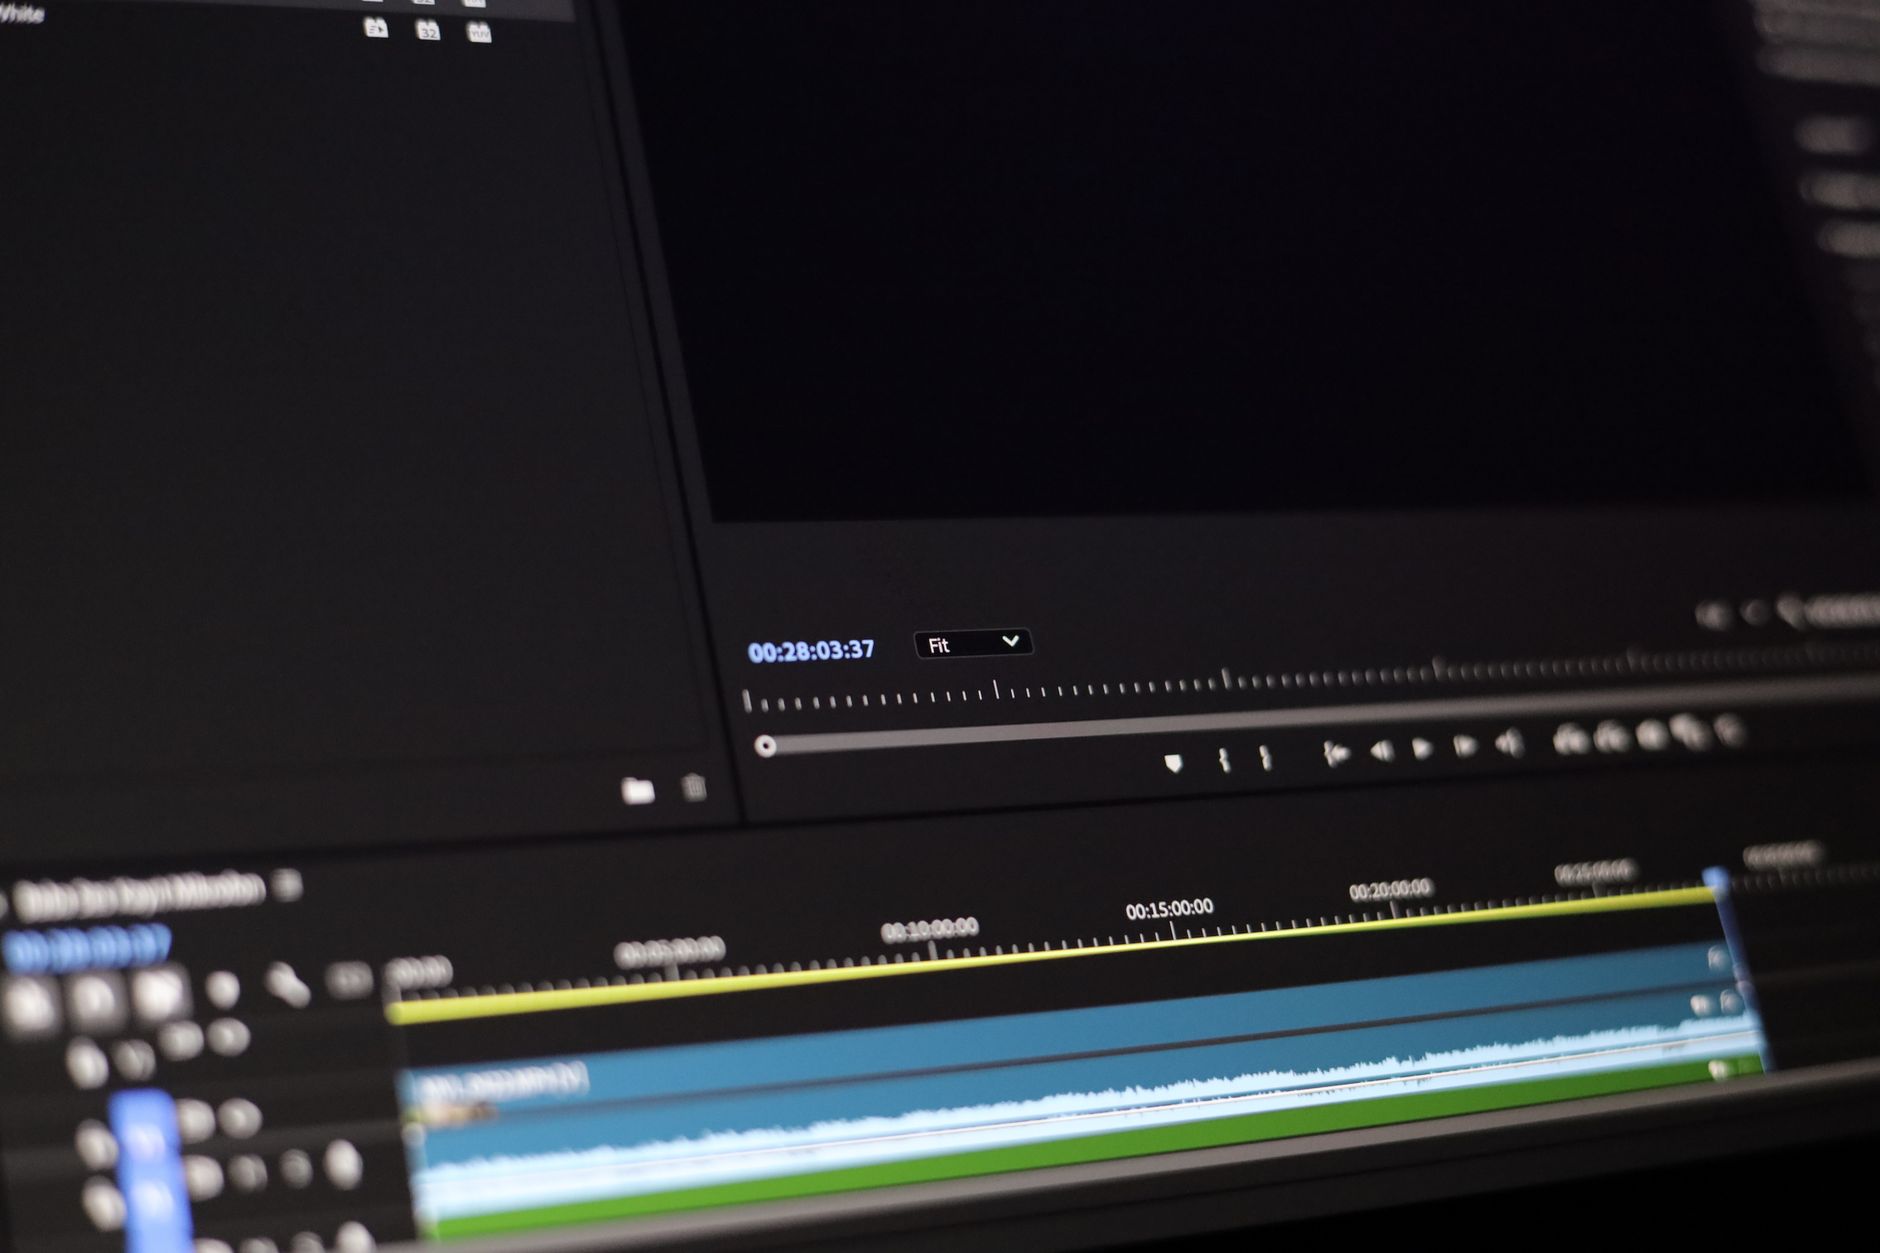
Aufnahmen und Audio importieren, Tracks ausrichten und eine Master-Timeline aufbauen
Importieren Sie Ihre Aufnahmen und Audio in Veo 3, legen Sie sie auf separate Tracks in der Master-Timeline ab und aktivieren Sie Wellenform-Vorschauen, um die Ausrichtung sofort zu bestätigen. Das ist keine Schätzung – klare Timing erzeugt eine zuverlässige Basis für zukünftige Bearbeitungen. In einer Workshop-Einstellung halten Sie Ihr Projekt organisiert: Beschreiben Sie Tracks, setzen Sie die Starter-Bildrate und halten Sie ein schlankes, schwarzes Vorschaufenster, um Ablenkungen zu reduzieren. Das geht nicht um Bot-Automatisierung; Sie steuern das Timing manuell.
Richten Sie grundlegende Projektparameter ein, die zu Ihren Kameras und Ihrer Audio-Kette passen. Nutzen Sie die grundlegenden Funktionen von Veo 3, um eine konsistente Samplingleistung (44,1 oder 48 kHz) und eine Standard-Bildrate zu sperren. Glauben Sie, dass sauberes, unglaublich straffes Timing den Unterschied zwischen guten und großartigen Ergebnissen macht. Wenn Sie Clips aus verschiedenen Quellen haben, ist das nicht optional und hält Ihre Qualität hoch für die Zukunft.
Richten Sie Tracks aus, indem Sie Audio-Wellenformen, Marker und bildgenaue Nudges verwenden. Für Dialoge zoomen Sie heran und straffen die Lip-Sync, bis die Klänge mit dem Video übereinstimmen. Für Action-Cues beziehen Sie sich auf einen Becken-Schlag oder einen Klatscher als Timing-Anker. Ein einziger Referenzpunkt pro Take hilft Ihnen, Konsistenz über Takes hinweg zu wahren, und wenn Sie mit begrenzten Ebenen arbeiten, halten Sie die Timeline schlank, um Verwirrung zu vermeiden. Das gesagt, freue ich mich, zu sehen, wie es zusammenkommt, dieser Ansatz zahlt sich aus, wenn Sie die Ergebnisse überprüfen.
Mit ausgerichteten Tracks bauen Sie Ihre Master-Timeline auf. Platzieren Sie Clips in einer logischen Reihenfolge, balancieren Sie Dialog und Musik mit Volumen-Envelope und fügen Sie Crossfades ein, wo Übergänge stattfinden. Der proprietäre Timeline-Engine in Veo 3 bietet flüssiges Scrubbing und genaues Timing, sodass Sie unglaublich konsistente Ergebnisse erzeugen können. Beschreiben Sie Ebenen klar (Dialog, Musik, SFX) und halten Sie einen dedizierten Master-Track für den finalen Mix. Verwenden Sie Marker, um das Tempo zu überprüfen und sicherzustellen, dass der Rhythmus über Szenen hinweg straff bleibt. Dieser schlanke Workflow hält die Qualität hoch und lässt zukünftige Bearbeitungen effizient bleiben.
| Schritt | Aktion | Notizen |
| Import | Aufnahmen und Audio importieren; auf separate Tracks legen | Wellenform-Ansicht aktivieren, Bildrate und Samplingleistung überprüfen; Kameras |
| Ausrichten | Audio mit Video synchronisieren mit Markern und Wellenform-Spitzen | Becken-Schläge oder Klatscher als Timing-Anker verwenden; Timing präzise halten |
| Aufbauen | Clips anordnen, Volumen-Envelopes setzen, Crossfades hinzufügen | Tracks klar beschreiben; Timeline nicht überladen |
| Überprüfen & Exportieren | Timeline abspielen; bei Bedarf anpassen; final exportieren | Qualität und Konsistenz überprüfen; Projektdatei speichern |
Pro Tools Audio-Verbesserung: Rauschunterdrückung, Equalization, Kompression und Lautstärkeanpassung
Wenden Sie eine Vier-Schritte-Kette an: Rauschunterdrückung, Equalization, Kompression und Lautstärkeanpassung auf jeden Clip in Ihrem Veo 3-Workflow für Google Vids an. Das hält den Sound sauber für jemanden, der Musik vor der Kamera balanciert, und liefert eine konsistente Version über Szenen hinweg. Verwenden Sie Vorlagen, damit Sie die gleiche Verarbeitung über Takes hinweg teilen und zuverlässige Ergebnisse für Marketing oder Kundenüberprüfung liefern können.
Rauschunterdrückung: Erfassen Sie einen Noise-Print aus einer ruhigen Region, dann wenden Sie eine leichte Breitband-Reduktion an, um den Noise-Floor um etwa 6–12 dB zu senken, während der vokale Körper erhalten bleibt. Schließen Sie stille Passagen ein, um den Print zu verfeinern. Setzen Sie einen High-Pass um 80 Hz, um Rumpeln zu entfernen; verwenden Sie ein kurzes Gate auf Pausen, falls nötig (Attack 5 ms, Release 60 ms). Wenn Sie Klicken oder plötzliche Pegel-Sprünge hören, reduzieren Sie um 2 dB und überprüfen Sie erneut; das hilft, Artefakte zu vermeiden, die Zuhörer ablenken.
Equalization: Beginnen Sie mit einem High-Pass bei 80 Hz, um Rumpeln zu schneiden, dann reduzieren Sie Trübung bei 150–250 Hz um 1–3 dB. Wenn die Stimme boxig klingt, notchen Sie 300–500 Hz um 1–2 dB. Fügen Sie einen sanften 2–4 dB-Lift um 3–6 kHz für Klarheit hinzu und erwägen Sie eine subtile 8–12 kHz-Shelf für Luft, wenn die Aufnahme in einem dumpfen Raum stattfindet. Eine kreative Notiz: Eine Frau-Roboterin könnte diese Basis für Konsistenz vorschlagen, während ein Bot Veränderungen in der Sibilanz überwacht. Das Ziel ist eine detaillierte, natürlich klingende Kurve, die über Szenen hinweg glatt bleibt.
Kompression: Wenden Sie ein 2:1 bis 3:1-Verhältnis mit einem mittelschnellen Knee an. Setzen Sie Attack um 8–15 ms und Release um 40–80 ms, um Transienten zu erhalten, während Dynamik geglättet wird. Verwenden Sie Soft Knee und 2–4 dB Makeup-Gain. Führen Sie eine leichte Parallel-Kette auf der Stimme aus, um Punch zu behalten, ohne Verständlichkeit zu opfern. Überprüfen Sie, dass der resultierende Pegel komfortabel bleibt, wenn er mit Hintergrundmusik gepaart wird, und vermeiden Sie wahrnehmbare Pumpen, insbesondere wenn Klicken oder Tastaturgeräusche im Bild vorkommen.
Lautstärkeanpassung: Messen Sie integrierte LUFS mit einem zuverlässigen Meter und zielen Sie auf etwa −14 LUFS für Online-Video ab, während True Peaks unter −1 dBTP bleiben. Nach der Kompression wenden Sie einen Brickwall-Limiter an, um Überschläge zu fangen, dann überprüfen Sie die Konsistenz über Clips innerhalb eines Videos hinweg. Validieren Sie gegen Googles Veröffentlichungsrichtlinien, damit die Lieferung mit Plattform-Normen übereinstimmt, und passen Sie an, wenn der Track plötzlich wechselt, wenn das Kamera-Mikrofon sich bewegt oder der Sprecher den Ton ändert.
Prompts, Vorlagen und Lieferung: Führen Sie ein detailliertes Logbuch jeder verwendeten Einstellung (Noise-Print-Größe, EQ-Bänder, Kompressionsverhältnisse, Lautstärkeziele) und speichern Sie diese als Vorlagen für Interviews, On-Camera-Narration und Ambient-Einfügungen. Verwenden Sie Prompts, um QA-Überprüfungen zu leiten – Zuhörer sollten Klarheit, konsistente Lautstärke und minimale Artefakte über musikalische Samples bemerken. Beispiele illustrieren, wie ein Bot oder eine Frau-Roboterin die Kette überprüft, dann Feedback an Creator liefert für wiederholbare Ergebnisse, die die Zukunft Ihres Audios poliert wirken lassen, nicht reaktiv. Das Teilen dieser detaillierten Praktiken mit Teammitgliedern hilft allen, ausgerichtet zu bleiben, sogar wenn das Projekt zu einer neuen Version oder Plattform wechselt, und liefert zuverlässige Sound-Ergebnisse, die Zuhörer engagiert und mit dem finalen Mix komfortabel halten.
Exportieren und Packen für Google Vids: Video-Codec, Audio-Codec, Bitraten und Metadaten
Exportieren Sie als MP4 mit H.264 High Profile (Level 4.1), 1080p bei 30fps und AAC-LC Stereo bei 128 kbps; aktivieren Sie Zwei-Pass-Encoding und setzen Sie ein 2-Sekunden-Key-Frame-Intervall, um die Lieferung und Ausgaben über Geräte hinweg zu optimieren. Diese Einrichtung liefert genug Qualität für die meisten Zuschauer, während die Dateigrößen handhabbar bleiben.
Wenn Sie ein Morgen-Projekt beenden, runden Sie die Assets zusammen und exportieren Sie zum gleichen Spezifikation, um Konsistenz für jede Ausgabe zu wahren und den Lieferungsprozess für Zuschauer und die Plattform vorhersehbar zu machen.
Diese Einstellungen stimmen mit der Technologie überein, auf die Google Vids angewiesen ist, und sie sind unkompliziert zu auditieren in Ihrem Workflow. Folgen Sie dieser Struktur, um sauber und zuverlässig zu packen:
- Video-Codec und Container
- Container: MP4
- Video-Codec: H.264 High Profile, Level 4.1–4.2
- Bildrate: Quelle anpassen (24/30/60); 30fps für allgemeinen Inhalt, 60fps für schnelle Bewegungen
- Key-Frame-Intervall: 2 Sekunden (60 Frames bei 30fps)
- Bit-Tiefe: 8-Bit ist Standard für Web-Wiedergabe
- Audio-Codec und Einstellungen
- Audio-Codec: AAC‑LC
- Kanäle: Stereo (2.0)
- Samplingleistung: 48 kHz (oder 44.1 kHz, falls erforderlich)
- Bitrate: 128 kbps Basis; 192 kbps, wenn Ihr Inhalt reiche Klänge hat
- Sync: Audio mit Video synchron halten, um Lip-Sync-Drift zu vermeiden
- Bitraten und Auflösung
- 1080p: Video 8–12 Mbps anstreben, Audio 128–192 kbps
- 720p: Video 4–6 Mbps anstreben, Audio 96–128 kbps
- 4K (optional): Video 35–45 Mbps anstreben, Audio 128–192 kbps
- Strategie: Konstante Rate oder Zwei-Pass VBR verwenden, um Ausgaben stabil zu halten
- Metadaten und Farbe
- Metadaten: Titel, Beschreibung, Schlüsselwörter, Sprache (de), Urheberrecht
- Farbraum: Rec.709; Farbbereich: Standard oder Full, je nach Eignung
- Farbmetadaten sollten Farben widerspiegeln und maximale Qualität in der Pipeline erhalten
- Untertitel: Einbeziehen, falls verfügbar, mit richtigen Sprachcodes
- Verpackung und Verifizierung
- Dateigröße und Dauer überprüfen; Sekunden-Ausrichtung mit Kapiteln sicherstellen, falls verwendet
- Wiedergabe auf Desktop und Mobile testen; Audio-Video-Sync, Gesichtstiming und dramatische Momente überprüfen
- Lieferbereitschaft für alle Zuschauer bestätigen, dann die Charge für die Veröffentlichung finalisieren
In dieser Struktur liefern Sie konsistente Qualität über Ausgaben hinweg und sorgen für eine reibungslose Erfahrung für Zuschauer mit langsamen Verbindungen und High-End-Geräten gleichermaßen. Der Ansatz hält Ihren Workflow effizient, während er die königlichen Qualitäten Ihres Inhalts erhält, und er ist zufällig einfach zu automatisieren in einem stabilen Produktionszyklus.
Wiederverwenden und Automatisieren: Vorlagen, Tastaturkürzel und eine finale QA-Checkliste für VEO3
Richten Sie eine Master-VEO3-Vorlage ein, die Intro/Outro, Untertitel-Stile, Audio-Routing und Farb-Presets umfasst. Dieser Plan hält das Tempo konsistent über Videos hinweg und macht das Handwerk schneller wiederholbar, indem er eine lange Bearbeitung in einen schlanken Prozess verwandelt. Bauen Sie die Struktur auf: Intro, Body, Outro, Assets und Notizen; speichern Sie sie in Ihrer Bibliothek, damit jedes neue Projekt mit demselben Rückgrat passiert. Wenn Sie eine Einstellung anpassen, propagiert die Änderung in die nächsten Schritte, und Sie können schnell zurückkehren, indem Sie zurück klicken.
Vorlagen sind Ihr Rückgrat für konsistente Ausgabe. Erstellen Sie eine organisierte Bibliothek mit Elementen wie „Intro“, „Main“, „Outro“, „LowerThird“ und einem „B-Roll-Paket“. Jede Vorlage sollte einen realistischen Beleuchtungsdurchlauf, eine fertige Farbkorrektur, Schriftstile und Standard-Bewegungs-Presets enthalten. Wenn Sie neue Beispiele hinzufügen, sehen Sie, was über verschiedene Videos funktioniert, und Sie können eine Beispiel-Einrichtung in ein neues Projekt kopieren für schnelle Wiederverwendung. Was am besten funktioniert, kommt oft aus wenigen prägnanten Vorlagen, denen Ihr Team vertrauen kann, nicht aus einem überfüllten Paket gemischter Assets. Interessante Beispiele zeigen, wie Creator auf Plan bleiben, während sie mit noch-universellen Elementen experimentieren.
Tastaturkürzel beschleunigen die Bearbeitung, ohne Ihren Fluss zu unterbrechen. Ordnen Sie einen Kern-Satz von Befehlen für Routineaufgaben zu: Leertaste zum Abspielen/Pausieren, J/K/L zum Rückwärts/Vorwärts-Shuttlen, I/O zum Markieren von In und Out, Ctrl/Cmd + C/V zum Kopieren/Einfügen und eine einzelne Taste, um eine gewählte Vorlage anzuwenden. Fügen Sie benutzerdefinierte Kürzel für das Hinzufügen von Markern, Umschalten von Untertiteln und Öffnen des Vorlagen-Panels hinzu. Wenn Sie durch Paneele klicken, halten Sie denselben Rhythmus über Clips hinweg, damit Kopfbewegungen und Timing absichtlich wirken, nicht zufällig. Das Klicken in Paneele sollte wie eine natürliche Erweiterung Ihres Plans wirken, nicht wie etwas Separates.
Automatisierung und Vorlagen arbeiten Hand in Hand, um Reibung zu reduzieren. Wenden Sie eine Vorlage einmal an, und Veo 3 füllt den Ton, Übergangsstil und Untertitel-Layout über die gesamte Sequenz aus. Dieser technologiegetriebene Ansatz hält die Ausführung stabil, während Sie sich auf das Storytelling konzentrieren, einschließlich des emotionalen Beats jeder Szene. Verwenden Sie Makros, um vorhersehbare Timings für Übergänge einzufügen und Audio-Cues mit Visuals auszurichten, damit das, was passiert, konsistent von Clip zu Clip bleibt. Vorlagen sollten sich an verschiedene Videos anpassen, während sie das zentrale Markengefühl erhalten.
Finale QA-Checkliste, um Erfolg zu sichern: 1) Audio-Sync für jede Szene verifiziert; 2) Pegel auf einen Zielbereich normalisieren (z. B. -12 bis -6 dB) und Headroom überwachen; 3) Übergänge sauber ohne Pop oder Drift; 4) Visuals passen zum Plan und Tempo, einschließlich Farbkonsistenz über Schnitte hinweg; 5) Artefakte überprüft – nach Staub, Kompressionsproblemen oder Bewegungsunschärfe suchen; 6) Vorlagen korrekt auf alle Tracks angewendet; 7) Untertitel stimmen mit gesprochenen Wörtern überein; 8) Exports im erforderlichen Format generiert (MP4/H.264, 1080p oder 4K je nach Bedarf) mit korrekter Bitrate; 9) Dateinamen und Metadaten für den Versand vollständig; 10) Backups erstellt und Versionierung klar; 11) Finale Freigabe von Creatorn (denen, die veröffentlichen werden) und ein klares Lieferfenster für den Plan. Diese Checkliste hält Sie auf Kurs vor der Einreichung.
Wenn Ihr Clip eine Frau-Roboterin oder andere charaktergetriebene Szenen enthält, überprüfen Sie, ob Kopf- und Körperbewegungen mit dem Dialog übereinstimmen, um Realismus zu erhalten. Stellen Sie sicher, dass bot-ähnliche Effekte glaubwürdig bleiben, und testen Sie den gesamten emotionalen Bogen in der Lieferung. Verwenden Sie eine konsistente Vorlage für solche Szenen, um Ton-Drift zu vermeiden, und überprüfen Sie, wo das Publikum subtile Verschiebungen in Tempo oder Betonung erwartet. Wenn Sie unsicher sind, was anzupassen ist, vergleichen Sie die aktuelle Ausgabe mit einem gut performenden Beispiel aus Ihrer Bibliothek und passen Sie die Vorlage oder Kürzel entsprechend an.
Führen Sie ein laufendes Logbuch darüber, was passiert ist (was funktioniert und was nicht), um Ihren Prozess zu verfeinern – so verwandeln Sie einen guten Workflow in einen widerstandsfähigen. Wiederverwenden, automatisieren und verifizieren, und Sie werden feststellen, dass die Geschwindigkeit Ihrer Produktion zunimmt, ohne die Qualität zu opfern.
📚 Mehr zu AI-Generierung & Prompts
- So erstellen Sie virale AI-Videos mit Google Veo 3 und Filmora - Eine Schritt-für-Schritt-Anleitung
- Google Veo 3 – Ein Leitfaden zur unbegrenzten AI-Video-Generierung
- Was ist Google Veo 3 Inside the Viral AI Video Model With Real Sound
- So erstellen Sie ein virales Video mit Großmüttern mit VEO 3 Fast - Ein praktischer Leitfaden
- Das Ende der Stummfilm-Ära - Google Veo 3 definiert AI-Video durch Sound neu
Ready to leverage AI for your business?
Book a free strategy call — no strings attached.


