Hoe Video Clips met Geluid Genereren met Veo 3 in Google Vids - Stapsgewijze Handleiding

Configureer Veo 3 in Google's Vids om een geluidsclip in 1080p60 te genereren en te exporteren als een gratis MP4. Deze essentiële elementen leggen een betrouwbare workflow vast vanaf het begin.
Organiseer assets in een soepele workflow: importeer footage van de camera, pas sjablonen toe en bouw een mastersequentie die aansluit bij je live filmplan. Het hoofd blijft gefocust omdat elke stap is uitgestippeld.
Vergrendel de audio aan de tijdlijn op 48 kHz, plaats het onder de visuals en gebruik gratis geluidspakketten om gaten te vullen; controleer niveaus in een snelle testrender. Live controles helpen je problemen vroeg te ontdekken en het project serieus te houden.
Sla je instellingen op als een herbruikbare masterpreset en pas het toe op aankomende weekprojecten om het ritme consistent te houden. Deze sjablonen stroomlijnen de productie en houden je team aligned en de workflow soepel.
In demonstraties, feature personages zoals vrouw-robot om pacing, captions en voice alignment te valideren; zegt de gids dat je efficiënter kunt genereren door te itereren na elke live review. Wanneer je publiceert, ben je terug in het proces en weet je wat je moet aanpassen voor de volgende week.
Configureer Veo 3 Project voor Google Vids: Resolutie, Framerate en Audio Sample Rate
Stel het Veo 3-project in op 1920x1080, 30fps en 48kHz stereo om schone geluiden en betrouwbare Google Vids-afspeelbaarheid te garanderen. Deze startopstelling biedt voldoende ruimte voor bewerkingen, captions en basis kleurwerk, terwijl bestandsformaten voorspelbaar blijven en je account georganiseerd is voor eenvoudige tracking van wijzigingen.
Voor clips met veel beweging, overweeg 1920x1080 bij 60fps om beweging soepel te houden en motion blur te verminderen. Dit werkt meestal goed voor dynamische dialogen en actie-momenten, en je kunt de hogere framerate omarmen om tracking te helpen en het gevoel dat de video natuurlijk aanvoelt. Als je mikt op een zachter, meer cinematografisch tempo, kun je ook beginnen met 30fps en later overschakelen afhankelijk van de shotcompositie.
Audio-opstelling doet er evenveel toe als beeld. Stel de audio sample rate in op 48kHz en gebruik stereo kanalen. Dit geeft je heldere geluiden en gebalanceerd geluid over speakers, wat helpt om de dialoog levendig te laten voelen. In Veo 3, kies 2-kanaals stereo in het setupmenu om de mix zacht en vriendelijk te houden voor de meeste luisteraars, vooral wanneer de beweging in het frame meerdere stemmen omvat.
In scènes met weinig licht kan korrel binnenkomen en de helderheid ondermijnen. Als je korrel ziet, duw niet op ISO; behoud in plaats daarvan de 48kHz/stereo-instellingen en fix exposure in post. Een lichte aanraking op noise reduction is genoeg om natuurlijke textuur te behouden, terwijl je een modderig gevoel vermijdt dat het begin van de dialoog en de waargenomen kwaliteit kan beïnvloeden. Deze mogelijkheden zullen je goed van pas komen in een startscenario, met ruimte om later aan te passen zonder de kernopname te compromitteren.
Sla deze configuratie op als je basisopstelling in je account, zodat je deze beslissingen niet voor elk project hoeft te heroverwegen. Het geeft je een consistente basis, helpt je op schema te blijven en maakt het gemakkelijk om een betrouwbare Veo 3-workflow over het team te verspreiden. Voor een snelle referentie kun je een eenvoudige notitie of nieuwsbrief delen met je getalenteerde crew – ze zullen je bedanken voor de stabiele basis en de duidelijke haken die iedereen aligned houden.
Quick Settings Snapshot
Resolutie: 1920x1080; Framerate: 30fps (60fps voor clips met veel beweging); Audio sample rate: 48kHz; Kanalen: stereo. Deze stappen weerspiegelen het hoofd van een soepele, vriendelijke en effectieve opstelling die werkt voor de meeste beginprojecten in Veo 3. De geest achter het proces zal de zachte balans tussen kwaliteit en bestandsgrootte waarderen, en het begin van een blijvende routine die goede praktijken omarmt en eenvoudige aanpassingen in de toekomst.
Importeer Footage en Audio, Align Tracks en Bouw een Master Tijdlijn
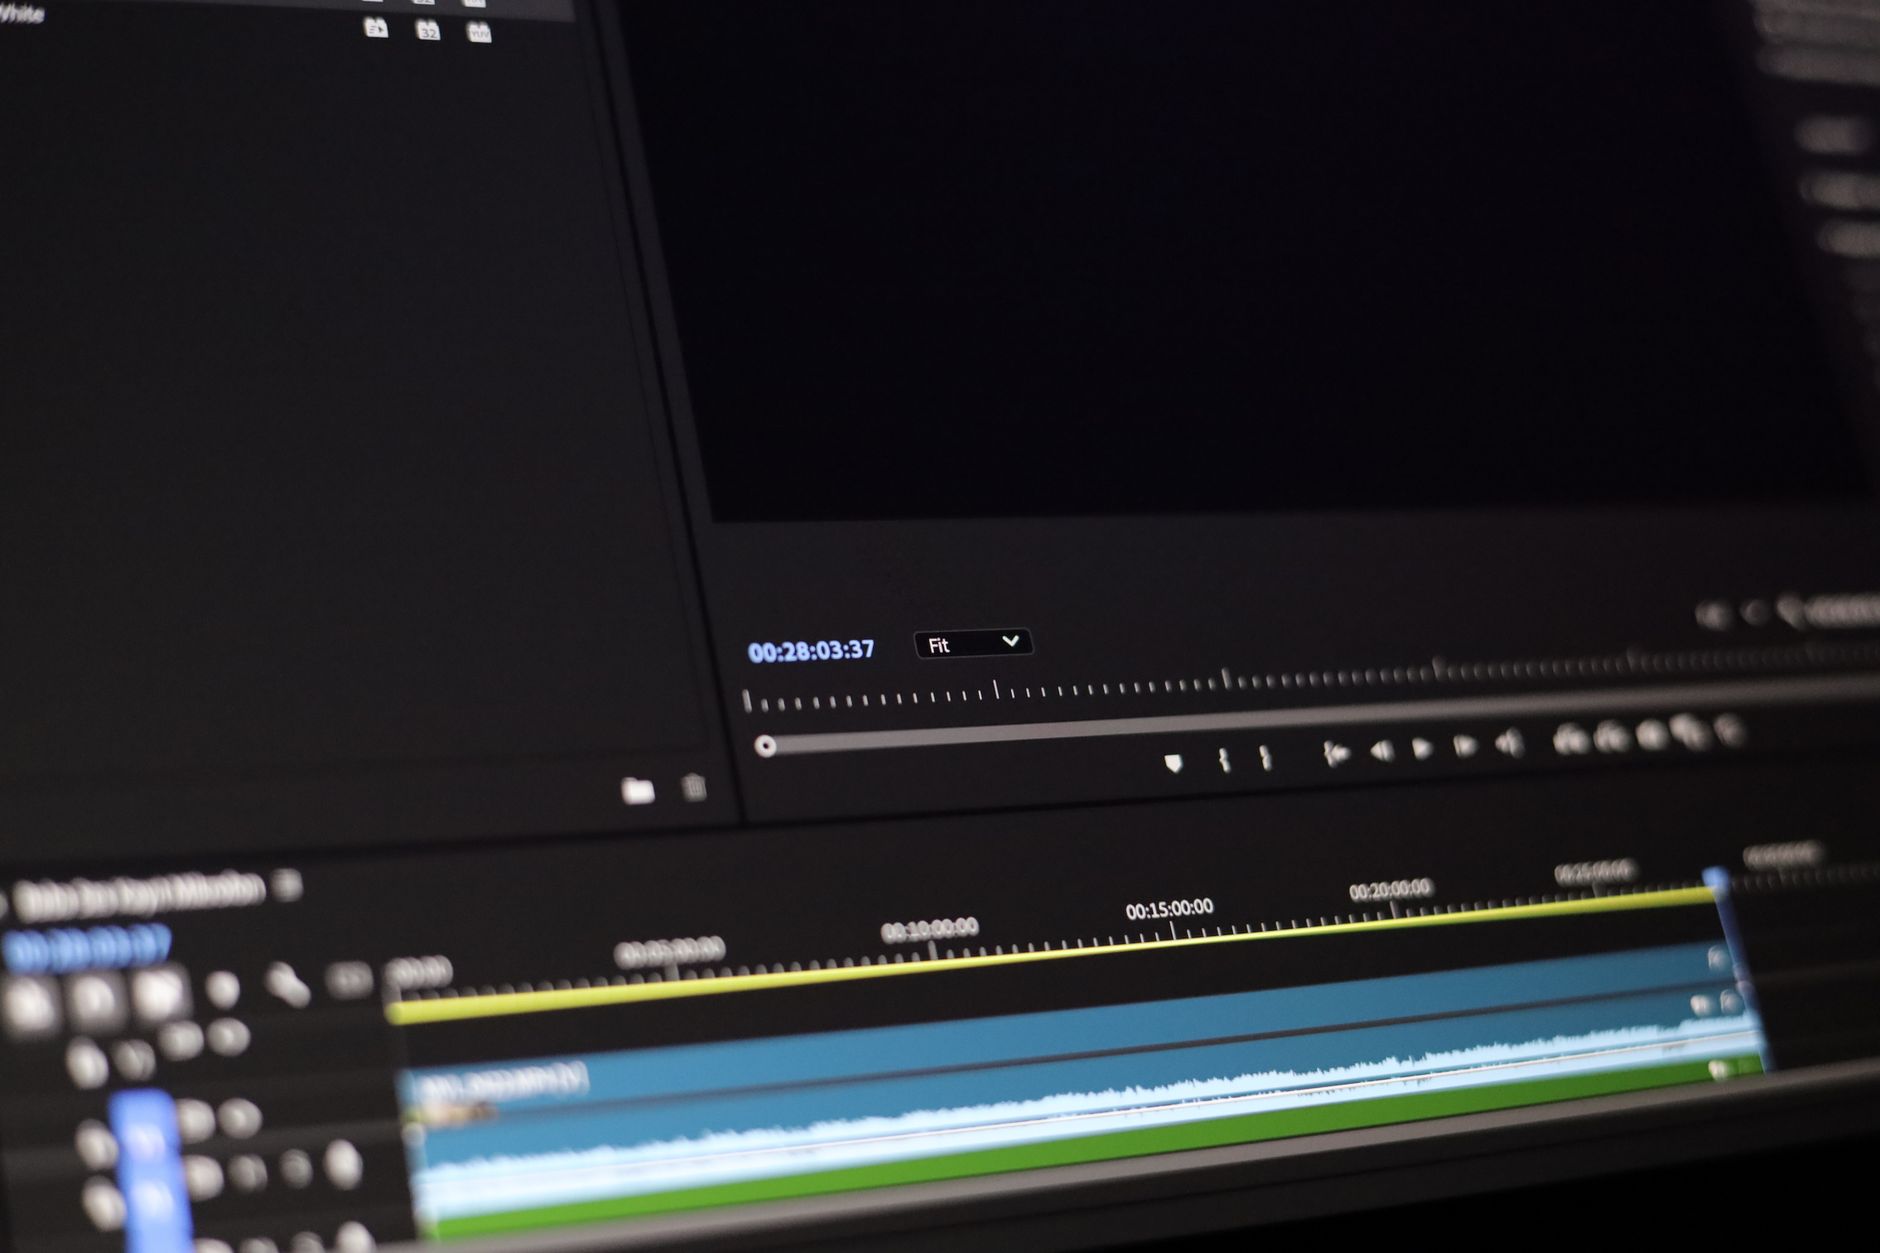
Importeer je footage en audio in Veo 3, drop ze op aparte tracks in de master tijdlijn en activeer waveform previews om alignment direct te bevestigen. Dit is geen giswerk – duidelijke timing produceert een betrouwbare basis voor toekomstige bewerkingen. In een workshopsetting, houd je project georganiseerd: label tracks, stel de startframerate in en houd een slank, zwart previewvenster om afleidingen te verminderen. Dit gaat niet over bot-automatisering; je controleert timing handmatig.
Stel basis projectparameters in om aan te sluiten bij je camera's en je audio keten. Gebruik Veo 3's basis mogelijkheden om een consistente sample rate (44.1 of 48 kHz) en een standaard framerate te vergrendelen. Geloof dat schone, ongelooflijk strakke timing het verschil maakt tussen goede en geweldige resultaten. Wanneer je clips hebt van verschillende bronnen, is dit geen optie en zal het je kwaliteit hoog houden voor de toekomst.
Align tracks door audio waveforms, markers en frame-accuraten nudges te gebruiken. Voor dialoog, zoom in en verstrak de lip-sync totdat de geluiden aansluiten bij de video. Voor actie cues, refereer een cymbal hit of een klap als timing anker. Het hebben van een enkel referentiepunt op elke take helpt je consistent te blijven over takes, en als je met beperkte lagen werkt, houd de tijdlijn lean om verwarring te vermijden. Dit zeggen, enthousiast om het samen te zien komen, deze aanpak loont wanneer je de resultaten reviewt.
Met de tracks aligned, bouw je master tijdlijn. Plaats clips in een logische volgorde, balanceer dialoog en muziek met volume envelopes en voeg crossfades in waar transities gebeuren. De proprietary tijdlijn engine in Veo 3 biedt soepele scrubbing en accurate timing, zodat je ongelooflijk consistente resultaten kunt produceren. Tag lagen duidelijk (dialoog, muziek, SFX) en houd een dedicated master track voor de finale mix. Gebruik de markers om pacing te reviewen en zorg ervoor dat het ritme strak blijft over scènes. Deze slanke workflow houdt kwaliteit hoog en laat je toekomstige bewerkingen efficiënt blijven.
| Stap | Actie | Notities |
| Importeer | Importeer footage en audio; plaats op aparte tracks | Activeer waveform view, verifieer framerate en sample rate; camera's |
| Align | Sync audio naar video met markers en waveform pieken | Gebruik cymbal hits of klappen als timing ankers; houd timing precies |
| Bouw | Regel clips, stel volume envelopes in, voeg crossfades toe | Label tracks duidelijk; vermijd overladen van de tijdlijn |
| Review & Export | Speel de tijdlijn af; pas aan indien nodig; exporteer finaal | Controleer kwaliteit en consistentie; sla een projectversie op |
Pro Tools Audio Enhancement: Noise Reduction, Equalization, Compression en Loudness Matching
Pas een vierstaps keten toe: Noise Reduction, Equalization, Compression en Loudness Matching op elke clip binnen je Veo 3 workflow voor Google Vids. Dit houdt geluid schoon voor iemand die muziek on-camera balanceert en levert een consistente versie over scènes. Gebruik sjablonen zodat je dezelfde processing kunt delen over takes en betrouwbare resultaten kunt leveren voor marketing of client review.
Noise Reduction: capture een noise print van een stille regio, pas dan lichte broadband reduction toe om de noise floor met ongeveer 6–12 dB te verlagen terwijl je vocale body behoudt. Inclusief stille passages om de print te verfijnen. Stel een high-pass in rond 80 Hz om rumble te verwijderen; gebruik een korte gate op pauzes indien nodig (Attack 5 ms, Release 60 ms). Als je klikken of plotselinge level jumps hoort, trek terug met 2 dB en controleer opnieuw; dit helpt artifacts te vermijden die luisteraars afleiden.
Equalization: begin met een high-pass op 80 Hz om rumble te snijden, verminder dan modderigheid door 150–250 Hz met 1–3 dB. Als de stem boxy klinkt, notch 300–500 Hz met 1–2 dB. Voeg een zachte 2–4 dB lift toe rond 3–6 kHz voor helderheid, en overweeg een subtiele 8–12 kHz shelf voor lucht als de opname in een doffe kamer zit. Een creatieve notitie: een vrouw-robot zou deze baseline kunnen voorstellen voor consistentie, terwijl een bot verschuivingen in sibilance monitort. Het doel is een gedetailleerde, natuurlijk klinkende curve die soepel blijft over scènes.
Compression: pas 2:1 tot 3:1 ratio toe met een medium-snelle knee. Stel attack in rond 8–15 ms en release rond 40–80 ms om transients te behouden terwijl je dynamiek verzacht. Gebruik soft knee en 2–4 dB makeup gain. Voer een lichte parallelle keten uit op stem om punch te behouden zonder intelligibiliteit op te offeren. Controleer dat het resulterende niveau comfortabel blijft wanneer gepaard met achtergrondmuziek en vermijd perceptible pumping, vooral wanneer klikken of toetsenbordgeluiden voorkomen in het frame.
Loudness Matching: meet geïntegreerde LUFS met een betrouwbare meter en mik op rond −14 LUFS voor online video, terwijl je true peaks onder −1 dBTP houdt. Na compressie, pas een brickwall limiter toe om overs te vangen, verifieer dan consistentie over clips binnen een enkele video. Valideer tegen Google's publishing richtlijnen zodat delivery aansluit bij platform normen, en pas aan als de track plotseling verschuift wanneer de camera mic beweegt of de spreker van toon verandert.
Prompts, sjablonen en delivery: houd een gedetailleerd log bij van elke gebruikte instelling (noise print grootte, EQ bands, compressie ratios, loudness doelen) en sla deze op als sjablonen voor interviews, on-camera narratie en ambient inserts. Gebruik prompts om QA controles te leiden – luisteraars zouden helderheid, consistente loudness en minimale artifacts moeten opmerken over muzikale samples. Voorbeelden illustreren hoe een bot of vrouw-robot de keten controleert, lever dan feedback aan creators voor herhaalbare resultaten, en zorg ervoor dat de toekomst van je audio gepolijst klinkt en eruitziet, niet reactief. Het delen van deze gedetailleerde praktijken met teammates helpt iedereen aligned te blijven, zelfs wanneer het project verschuift naar een nieuwe versie of platform, en levert betrouwbare geluidresultaten die luisteraars engaged en comfortabel houden met de finale mix.
Exporteer en Pack voor Google Vids: Video Codec, Audio Codec, Bitrates en Metadata
Exporteer als MP4 met H.264 High Profile (Level 4.1), 1080p bij 30fps en AAC-LC stereo bij 128 kbps; activeer two-pass encoding en stel een 2-seconden keyframe interval in om delivery en outputs over apparaten te optimaliseren. Deze opstelling levert voldoende kwaliteit voor de meeste kijkers terwijl bestandsgroottes beheersbaar blijven.
Wanneer je een ochtendproject afmaakt, rond de assets op en exporteer naar dezelfde spec om consistentie te behouden voor elke output, waardoor het delivery proces voorspelbaar wordt voor kijkers en het platform.
Deze instellingen sluiten aan bij de technologie waarop Google Vids vertrouwt, en ze zijn eenvoudig te auditen in je workflow. Volg deze structuur om schoon en betrouwbaar te packen:
- Video Codec en Container
- Container: MP4
- Video Codec: H.264 High Profile, Level 4.1–4.2
- Framerate: match bron (24/30/60); gebruik 30fps voor algemene content, 60fps voor snelle beweging
- Keyframe interval: 2 seconden (60 frames bij 30fps)
- Bit depth: 8-bit is standaard voor web afspeelbaarheid
- Audio Codec en Instellingen
- Audio Codec: AAC-LC
- Kanalen: Stereo (2.0)
- Sample rate: 48 kHz (of 44.1 kHz indien vereist)
- Bitrate: 128 kbps baseline; 192 kbps als je content rijke geluiden heeft
- Sync: houd audio in sync met video om lip-sync drift te vermijden
- Bitrates en Resolutie
- 1080p: mik video 8–12 Mbps, audio 128–192 kbps
- 720p: mik video 4–6 Mbps, audio 96–128 kbps
- 4K (optioneel): mik video 35–45 Mbps, audio 128–192 kbps
- Strategie: gebruik constant rate of two-pass VBR om outputs stabiel te houden
- Metadata en Kleur
- Metadata: titel, beschrijving, keywords, taal (en), copyright
- Kleur ruimte: Rec.709; kleur bereik: standaard of full indien gepast
- Kleur metadata zou kleuren moeten weerspiegelen en maximale kwaliteit behouden in de pipeline
- Ondertitels: inclusief indien beschikbaar met juiste taal codes
- Packaging en Verificatie
- Verifieer bestandsgrootte en duur; zorg voor seconden alignment met hoofdstukken indien gebruikt
- Test afspeelbaarheid op desktop en mobiel; controleer audio-video sync, gezicht timing en dramatische momenten
- Bevestig delivery readiness voor iedereen die kijkt, finaliseer dan de batch voor publiceren
Binnen deze structuur lever je consistente kwaliteit over outputs, en lever je een soepele ervaring voor kijkers met langzamere verbindingen en high-end apparaten alike. De aanpak houdt je workflow efficiënt terwijl je de koninklijke kwaliteiten van je content behoudt, en het gebeurt gemakkelijk te automatiseren in een stabiele productiecycli.
Hergebruik en Automatiseer: Sjablonen, Toetsenbord Shortcuts en een Finale QA Checklist voor VEO3
Stel een master VEO3 sjabloon in die intro/outro, caption stijlen, audio routing en kleur presets omvat. Dit plan houdt het tempo consistent over video's en maakt het craft sneller te herhalen, en verandert een lange edit in een lean proces. Bouw de structuur: intro, body, outro, assets en notities; sla het op in je library zodat elk nieuw project gebeurt met dezelfde backbone. Wanneer je een instelling tweakt, propageert de verandering naar de volgende stappen, en je kunt snel terugkeren door terug te klikken.
Sjablonen zijn je backbone voor consistente output. Creëer een georganiseerde library met items zoals "Intro," "Main," "Outro," "LowerThird," en een "B-Roll pack." Elk sjabloon zou een realistische lighting pass moeten omvatten, een ready-to-use kleur grade, font stijlen en default motion presets. Naarmate je nieuwe voorbeelden toevoegt, zul je zien wat werkt over verschillende video's, en je kunt een voorbeeldopstelling kopiëren in een nieuw project voor snelle hergebruik. Wat het beste werkt komt vaak van een paar beknopte sjablonen die je team kan vertrouwen, niet van een crowded pack van gemixte assets. Interessante voorbeelden tonen hoe creators op plan blijven terwijl ze experimenteren met nog-universele elementen.
Toetsenbord shortcuts versnellen editing zonder je flow te breken. Map een core set van commando's om routine taken te hanteren: Space om te play/pause, J/K/L voor shuttle back/forward, I/O om in en out te markeren, Ctrl/Cmd + C/V om te copy/paste, en een enkele toets om een gekozen sjabloon toe te passen. Voeg custom shortcuts toe voor het toevoegen van markers, togglen van captions en openen van de sjablonen panel. Wanneer je door panels klikt, houd hetzelfde ritme over clips zodat hoofdbewegingen en timing intentional voelen, niet random. Klikken in panels zou moeten voelen als een natuurlijke extensie van je plan, niet als een apart ding.
Automatisering en sjablonen werken hand in hand om wrijving te verminderen. Pas een sjabloon eenmaal toe, en Veo 3 vult de toon, transitie stijl en caption layout over de gehele sequentie. Deze technologie-gedreven aanpak houdt de uitvoering steady terwijl je focust op storytelling, inclusief de emotionele beat van elke scène. Gebruik macros om voorspelbare timings voor transities in te voegen en audio cues te alignen met visuals, zodat wat gebeurt consistent blijft van clip tot clip. Sjablonen zouden moeten aanpassen aan verschillende video's terwijl ze het centrale brand gevoel behouden.
Finale QA Checklist om succes te vergrendelen: 1) Audio sync geverifieerd voor elke scène; 2) Normaliseer niveaus naar een doelbereik (bijv. -12 tot -6 dB) en monitor headroom; 3) Transities schoon zonder pop of drift; 4) Visuals match plan en tempo, inclusief kleur consistentie over cuts; 5) Artefacten gecontroleerd – zoek naar stof, compressie issues of motion blur; 6) Sjablonen correct toegepast over alle tracks; 7) Ondertitels alignen met gesproken woorden; 8) Exports gegenereerd in het vereiste formaat (MP4/H.264, 1080p of 4K indien nodig) met correcte bitrate; 9) Bestandsnaming en metadata compleet voor verzending; 10) Backups gecreëerd en versioning duidelijk; 11) Finale sign-off van creators (degenen die zullen publiceren) en een duidelijke delivery window voor het plan. Deze checklist houdt je op schema voor indiening.
Wanneer je clip een vrouw-robot of andere character-driven scènes bevat, verifieer dat hoofd- en lichaambewegingen alignen met dialoog om realisme te behouden. Zorg ervoor dat bot-achtige effecten geloofwaardig blijven, en test de overall emotionele arc in de delivery. Gebruik een consistent sjabloon voor zulke scènes om drift in toon te vermijden, en review waar het publiek subtiele shifts in tempo of emphasis verwacht. Als je niet zeker weet wat je moet aanpassen, vergelijk de huidige output met een goed presterend voorbeeld uit je library en pas het sjabloon of shortcuts dienovereenkomstig aan.
Houd een lopend log bij van wat er gebeurd is (wat werkt en wat niet) om je proces te verfijnen – dit is hoe je een goede workflow verandert in een veerkrachtige. Hergebruik, automatiseer en verifieer, en je zult vinden dat de velocity van je productie toeneemt zonder kwaliteit op te offeren.
📚 Meer over AI Generatie & Prompts
- Hoe Viral AI Video's Creëren met Google Veo 3 en Filmora - Een Stapsgewijze Gids
- Google Veo 3 – Een Gids voor Onbeperkte AI Video Generatie
- Wat Is Google Veo 3 Binnenin het Virale AI Video Model Met Echt Geluid
- Hoe een Virale Video Creëren met Oma's Gebruikmakend van VEO 3 Fast - Een Praktische Gids
- Het Einde van het Stille Tijdperk - Google Veo 3 Herdefinieert AI Video Door Geluid
Ready to leverage AI for your business?
Book a free strategy call — no strings attached.


