Ako video obsah posilňuje vašu osobnú značku – Budujte autoritu a viditeľnosť
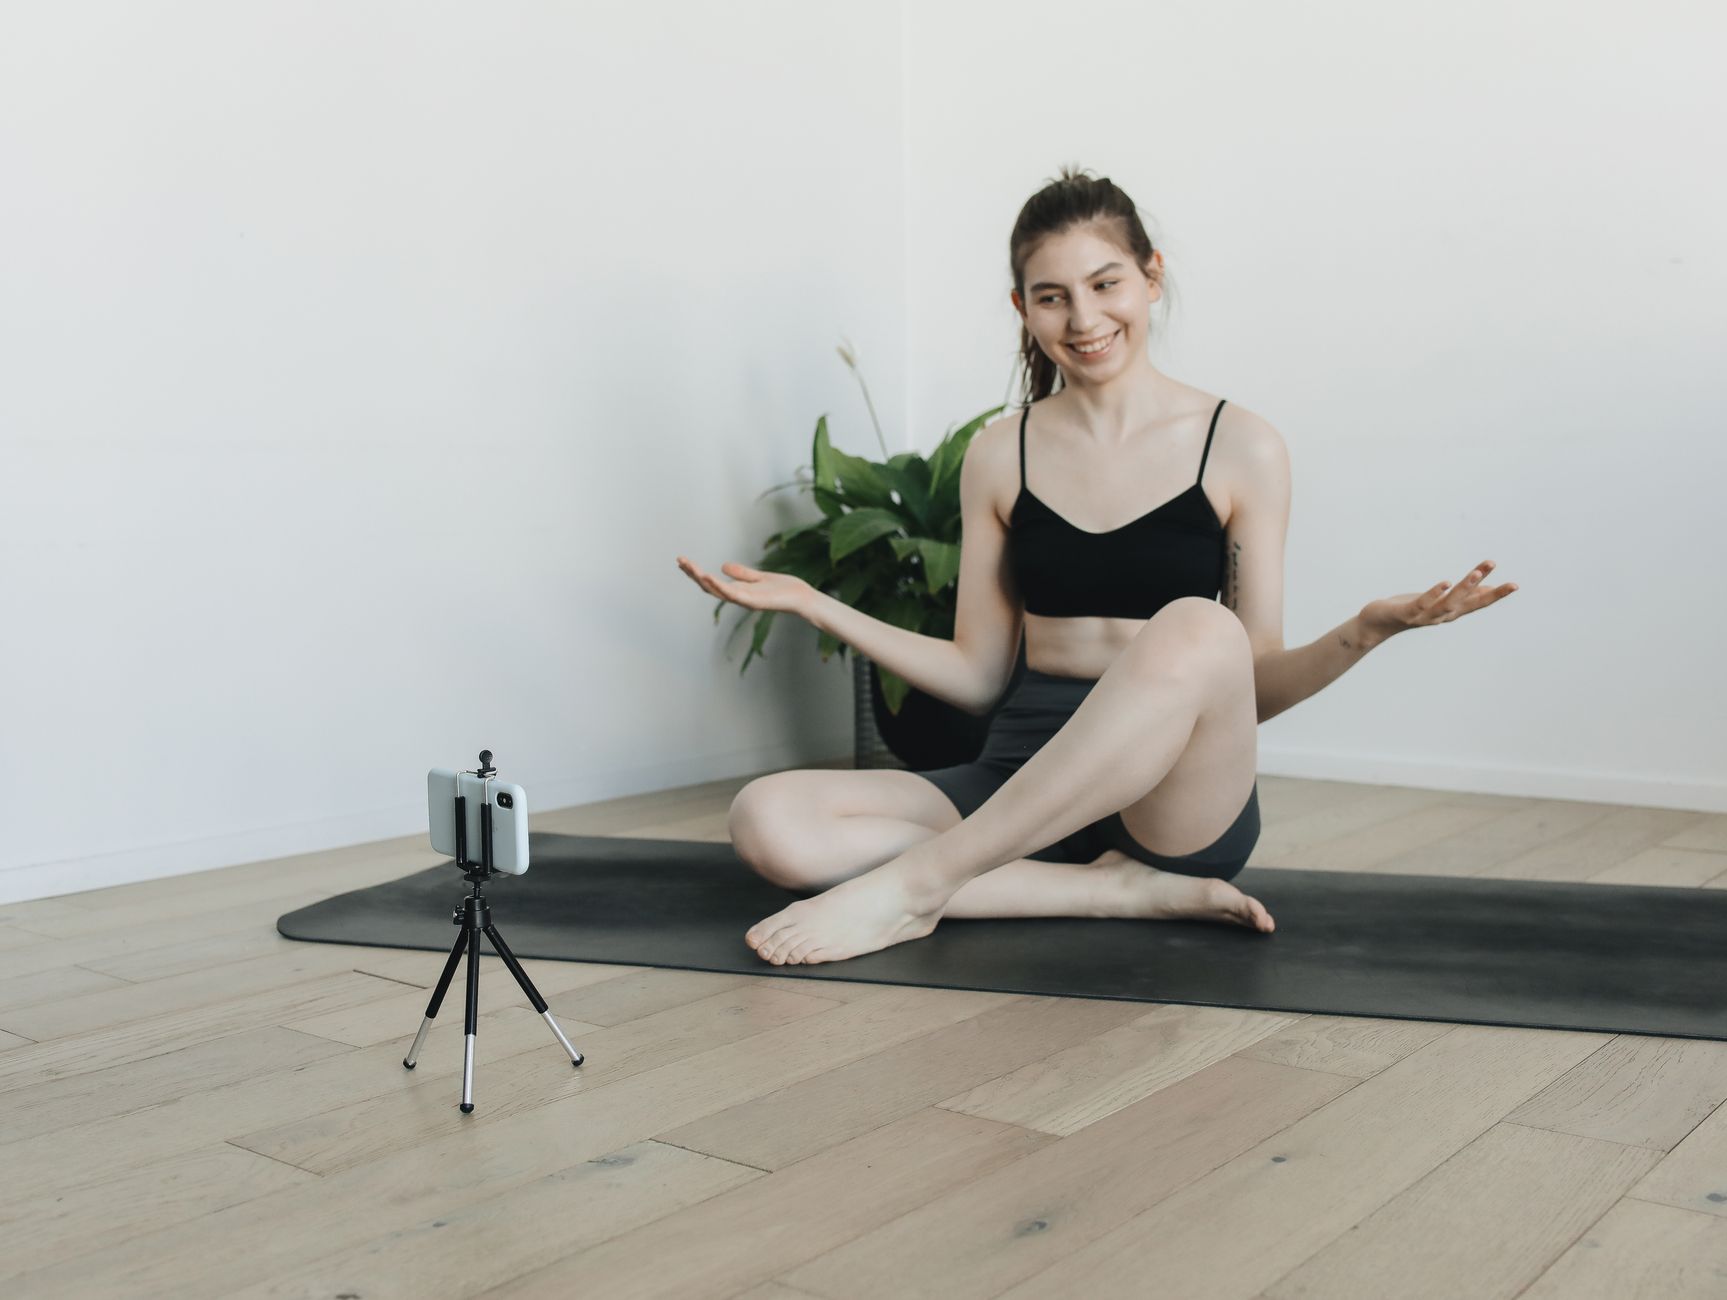
Publikujte 60-sekundové video každý týždeň, aby ste upevnili svoju niku a začali úsvit svojej osobnej značky. Tento stručný formát vám umožní predstaviť jednu jasnú myšlienku, podložiť ju rýchlym dôkazom a poskytnúť nezabudnuteľny háčik. Ponúknite bezplatnú šablónu pre titulky na stiahnutie, aby ste zjednodušili zdieľanie na rôznych platformách. Konzistentnosť sa počíta: keď sa objavíte podľa plánu, diváci vedia, kde hľadať, a vaša autorita rastie s každým publikovaným klipom.
Navrhnite rytmus vašich videí s predvídateľným tempom: pevný háčik v prvých 3 sekundách, otočný bod v strede a ostrý záver na konci. Tento rytmus udržiava diváka zapojeného a čas sledovania sa predlžuje. vedenie diváka cez stručný priebeh udržiava vysokú retenciu. myslite na každý klip ako na mini prezentáciu, ktorá buduje dôveryhodnosť namiesto výplne. Titulky zvyšujú prístupnosť a uzamykajú vašu správu aj keď je obrazovka stlmená; pomáhajú aj keď divák rozhodne prehliadať ďalšie obsahy.
Investujte do slušného mikrofónu a čistého nastavenia obrazovky. Vysokokvalitný mikrofón odlišuje váš hlas od pozadiešumu a robí vašu správu jasnou na malých zariadeniach; pre väčšinu divákov je kvalita zvuku kľúčovým faktorom na zotrvanie. Ak upgrade nie je ešte možný, umiestnite mikrofón blízko seba a nahrávajte v tichej miestnosti – zlepšenie je obrovské a okamžité.
Používajte provokačné háčiky na konci každého videa a informujte divákov o tom, čo príde ďalej. Malá provokácia o nasledujúcom témate zvyšuje návratnosť návštevníkov. Vyhnite sa zbytočným ozdobám; každá sekunda by mala niesť hodnotu a posilňovať vašu pozíciu ako zdroja v nike. Zahŕňajte jasné volanie k akcii, ktoré vedie diváka na váš profil alebo priame stiahnutie, ako napríklad kontrolný zoznam, na prehĺbenie zapojenia.
Plánujte opakateľnú rutinu výroby: napíšte skript jednu myšlienku, natáčajte s čistým nastavením, editujte pre tempo s rytmom a titulkami a publikujte v pevne stanovený deň. Sledujte metriky ako priemerný čas sledovania, retencia divákov a noví sledovatelia, aby ste videli, ktoré témy fungujú najlepšie. Konzistentný hlas a jednoduchý záver vás odlíšia od ostatných a urobia váš vzhľad rozpoznateľným naprieč veľkosťami obrazoviek, aplikáciami a feedmi. Ak chcete rásť rýchlejšie, spojte video s jednoduchým zdrojom a pozvite komentáre na vyvolanie pokračujúcich rozhovorov s divákom.
Definujte svoju niku a publikum film noir značky
Vyberte jednu noir tému a jedno publikum, potom zarovnajte svoje brandovanie okolo jedného náladu, palety a rytmu rozprávania. Tento zameraný prístup vedie každé video, titulok a produkt, takže diváci vedia, čo očakávať.
Nastavte merateľné ciele: produkujte epizódy 3–5 minút, publikujte štyri príspevky týždenne a vyvíjajte 12 značkových presetov alebo šablón na štandardizáciu vizuálov. Definujte úspech podľa uložení, zdieľaní a návštev profilu, s cieľom 20% nárastom uložení mesačne po tri mesiace.
Vytvorte persony publika okolo mestských kreatívcov, študentov filmov a nezávislých tvorcov v mestských centrách, vek 24–38. Cieľte na platformy, kde trávia čas: Instagram Reels, YouTube Shorts a týždenný e-mailový update s pohľadom za kulisy.
Výrobná remeselná zručnosť sa počíta: používajte osvetlenie na vyrezávanie tieňov a náladovú atmosféru. Rám okna rámkuje subjekt; svetlá by mali zasiahnuť textúry a kaluže na ulici odrážajú neón, takže scéna pôsobí hmatateľne. Nechajte rytmus prechádzať od pevných, úderných strihov k dlhším, kontemplatívnym záberom.
Rám okna rámkuje snímku; svetlá blikajú; kaluže odrážajú neón; potom medzi tieňmi, v podstate naučte sa podporovať tvorbu hrany.
| Voľba niku | Profil publika | Formáty obsahu | Taktiky |
|---|---|---|---|
| Mestský noir súkromného detektíva | Mestskí kreatívci, študenti a indie filmári v mestách; 25–40 | 2–5 min mikro-dokumenty, foto eseje, značkové presety | Konzistentná paleta osvetlenia; opakujúci sa motív tieňov |
| Nálada femme noir | Fanúšikovia štýlu a rozprávania; dizajnéri; diváci s módnym smerom | Krátke klipy, štýlizované vizuály, mood boardy | Silná typografia, neónové odrazy, čistý dizajn zvuku |
| Vigneta západu slnka v uličke | Fotografi, tvorcovia obsahu cieliaci na náladovo riadenú prácu | Séria statických obrázkov s mikro-videami, b-roll | Tlmeneý farebný grading, hmatateľné textúry, jemná narácia |
Vytvorte podpisovú vizuálnu reč noir: Osvetlenie, tiene a grading
Prijmite trojbodové noir nastavenie: tvrdý kľúč, obmedzený plnič a okraj na modelovanie hĺbky. Tento štruktúrovaný prístup zabezpečuje komunikáciu nálady s presnosťou a posilňuje brandovanie naprieč klipmi, poskytujúc vzrušujúci vzhľad pre publikum.
Umiestnite kľúč približne 30-45 stupňov, udržte plnič pevný na zachovanie čitateľnosti a nechajte okraj oddeliť subjekt od uličného pozadia pre rýchle čítanie na malých obrazovkách.
Používajte slnečné svetlo pre denné scény alebo umelé pouličné lampy pre noci. Každá voľba osvetlenia by mala mapovať na vaše médium a odvetvie a jasne viesť divákov cez príbeh.
Doporučené kroky na optimalizáciu expozície a hĺbky: kalibrujte automatickú expozíciu kamery, nastavte základný ISO a testujte s jedným klipom pred škálovaním na sekvenciu.
Keď plánujete, integrujte osvetlenie s pohybom kamery a zvukom, aby ste udržali konzistentný noir hlas naprieč rôznymi podnikmi.
Vyskúšajte presety filmoras na naštartovanie vzhľadu, potom prispôsobte kontrast a farbu vašej značke. To zníži problémy v post-produkcii pri zachovaní kinematografickej hrany.
Štruktúrujte svoj workflow okolo krok-za-krokom metódy, ktorú môže váš tím opakovať, od testov osvetlenia po finálny grading, takže koncept funguje naprieč klipmi a kampaňami.
Osvetľovacie techniky pre podpis noir
Smerovosť sa počíta: nastavte kľúčové svetlo na produkciu tvrdých tieňov s ostrými hranami, ktoré modelujú tvár; použite kompaktný modifikátor na udržanie ostrej hrany v detailoch.
Rozšírte plnič s reflektorom alebo zdrojom nízkej intenzity na udržanie čitateľnosti bez sploštenia kontrastu, zachovávajúc dramatickú hĺbku.
Zadné svetlo alebo svetlo na vlasy pridá tenkú aureolu, ktorá oddelí subjekt od tmavého pozadia, najmä na uličných alebo priemyselných lokalitách.
Myslite na miesto natáčania: úzke ulice, dažďom skĺzavý povrch a neónové značky všetky prispievajú k noir jazyku; zarovnajte osvetlenie s týmito konceptmi pre konzistentnosť a kreatívne plánovanie.
Grading na zachovanie hĺbky a brandovania
Pri gradingu tlačte tiene na odhalenie textúry bez drvenia detailov; udržte vrcholy v rozsahu 85-95% na zachovanie čitateľnosti v jasných scénach.
Použite podpisovú krivku na udržanie konzistentného vzhľadu naprieč epizódami. Mierne zvýšte zdvih v tieňoch pre filmovú hĺbku, ktorá komunikuje autoritu a dôveryhodnosť; to podporuje brandovanie a pomáha vám vyniknúť v preplnenom odvetví.
Aplikujte noir-orientovanú farebnú paletu: chladné tyrkysové tiene s teplými strednými tónmi alebo jemný sépia pre vintage pocit. Použite LUTy filmoras alebo manuálne krivky na doladenie, zabezpečujúc, aby sa vzhľad prekladal naprieč zariadeniami.
Navrhnite akčné formáty videí, ktoré etablujú vašu autoritu
Vyberte pevný 3-minútový formát s pevným intróm a tromi akčnými krokmi na poskytnutie hmatateľných výsledkov. Toto nastavenie vás robí okamžite dôveryhodným, intímnym a ľahšie dôveryhodným, keď zdieľate metódy, ktoré fungujú. Udržujte tmavú paletu pre sústredenie a štýlovo vysoko kvalitný vzhľad, ktorý signalizuje kvalitu.
Krok 1: Otvorte s odvážnym intróm, ktorý uvádza váš nárok približne za 12 sekúnd, potom ukážte stručný dôkaz. Použite vysoko kvalitný voiceover alebo možnosť text-to-speech a udržte kadenciu melodickú na udržanie pozornosti.
Krok 2: Pridajte overlaye na zdôraznenie čísel alebo citátov; nechajte divákov prepínať medzi pred/po vizuálmi; potiahnite scény na úpravu tempa.
Krok 3: Ukončite s konkrétnym záverom a CTA pripraveným na zdieľanie. Optimalizujte metadáta, náhľady a titulky pre vyhľadávanie a prístupnosť; použite atmosférickú, surreálnu podložku zvukov na zlepšenie atmosféry.
Na pokrytie rôznych kanálov ponúknite variácie: 60-sekundovú verziu pre reels, 2–3 minútový explainer a 15–30 sekundový teaser. Použite stredne dlhý formát, keď je potrebná hĺbka bez straty tempa. Vyvažte intímne momenty s ostrými, futuristickými vizuálmi na udržanie zapojenia a znovu použite melodickú zvukovú podložku naprieč epizódami. hanna funguje ako študijný prípad, ukazujúc, ako praktické tipy kombinujú s ľudským dotykom na budovanie dôvery s vaším publikom.
Zoznam implementácie
Navrhnite opakovateľnú šablónu a pevný skript; vytvorte trojkrokové narácie; vrstvite overlaye a volania k akcii; nahrávajte voiceover s voľbou tradičného alebo text-to-speech; publikujte s optimalizovanými metadátami a prístupnými titulkami; monitorujte zapojenie a upravujte formáty na základe dát.
Skript pre tajomstvo a jasnosť: Silné otvorenia a jasné závery
Otvorte s 4–6 sekundovým tajomstvom, ktoré kladie otázku, a poskytnite jediný, akčný záver do posledného rámu.
Použite storyboard na mapovanie tajomstva a jasnosti vedľa seba. Každý panel by mal etablovať hranu v osvetlení, presný vzhľad a jasnú funkciu v časovej osi. Myslite v pojmoch kompozície, ktorá vedie oko diváka od tichého zrna k odvážnemu rozlíšeniu.
-
Otvárania, ktoré spájajú intrígu s inštrukciou:
- Začnite s vizuálnym podnetom a pevnou líniou skriptovania, ktorá naznačuje odmenu bez prehnaného vysvetľovania.
- Uzamknite prvý rám na slnečné svetlo alebo západ slnka na nastavenie nálady, potom prejdite na ostré kľúčové svetlo pre odhalenie.
- Použite štýlovo minimalistický vzhľad a jemnú indie atmosféru na pocit autenticity namiesto prehnanej produkcie.
-
Vytvorte jadro s jasným podnetom a emocionálnou chrbticou:
- Vyberte jednu emocionálnu priebežnú líniu – emocionálne nabitú, ale zakorenenú v hmatateľnom výsledku.
- Napíšte finálnu vetu, ktorá odpovedá na počiatočnú otázku s konkrétnou akciou, ktorú môže divák podniknúť dnes.
- Udržte tón sebavedomý, nie uponáhľaný; použite stručné tempo, ktoré zodpovedá vašej hudbe a tempu.
-
Vizuály, ktoré posilňujú správu:
- Plánujte osvetlenie, ktoré sa mení od jasného slnečného svetla k kontrolovaným tieňom na zdôraznenie kontrastu a hĺbky.
- Aplikujte zámernú hranu v rámovaní; nechajte subjekt sedieť na okraji rámu na vyvolanie zvedavosti.
- Inkorporujte zrno zámerne na sprostredkovanie textúry bez obetovania čitateľnosti.
-
Skriptovanie, ktoré vedie pochopenie:
- Udržte vety krátke a aktívne; spojte provokačnú líniu s presným záverom.
- Mapujte časovú os, aby divák zažil napätie najprv, potom jasnosť v poslednom údere.
- Použite podnet, ktorý pozýva k akcii, ako „Skúste to vo vašom ďalšom príspevku“, nasledovaný konkrétnym krokom.
-
Výrobná disciplína na predbehnutie rivalov:
- Vyberte nástrojový set, ktorý vyvažuje efektivitu a kvalitu – editor s silnými ovládaniami farieb, čistým zvukom a vrstveným dizajnom zvuku.
- Zarovnajte tempo hudby s kadenciou záberov; kontrastujte pokojné momenty s rozhodným rytmom počas odmeny.
- Udržte konzistentnosť naprieč vzhľadom, osvetlením a kompozíciou na budovanie rozpoznateľného štýlového línie.
-
Finálna kontrola a dodanie:
- Zabezpečte, aby finálna línia bola akčná a špecifická; vyhnite sa vágne vyjadreniam a poskytnite ostrý výsledok.
- Dvakrát skontrolujte, či záver zapadá do jedného obrazovky alebo pevného strihu a dá sa ľahko spomenúť dnes.
- Exportujte v rozlíšení a bitovej rýchlosti, ktoré zachovávajú vizuálnu textúru, najmä ak plánujete publikovať na viacerých platformách.
Praktický príklad na upevnenie prístupu: otvorte s rýchlou otázkou v štýlovom ráme, prejdite na dennú scénu slnečného svetla, odhalite jednoduchú, akčnú taktiku v jednej vete, potom ukončite finálnou líniou, ktorú môžu diváci implementovať teraz. Použite súdržný vzhľad a čistú hranu na udržanie pozornosti na správe, nie na flashy distrakciách. Pamätajte – cieľ je jasnosť popri tajomstve, takže publikum sa cíti vedené namiesto zahlteného.
Produkujte konzistentne v štýle noir: Nastavenie, zvuk a post-produkcia
Nastavte tichú, opakateľnú noir súpravu: jeden spoľahlivý mikrofón, malý rekordér a jedno kľúčové svetlo. Rámujte pevne, aby ste udržali sústredenie na reč a príbeh, potom udržujte zoomy zámerné na zvýšenie nálady namiesto distrakcie. Tento prístup podporuje pozornosť na váš hlas, vašu osobnosť a emocionálnu hĺbku, ktorú zdieľate v každom indie kuse. V podstate vám to dáva jasnú cestu k konzistentnosti a hĺbke komunikácie s vaším publikom.
- Nastavenie
- Miesto a atmosféra: vyberte miesto s textúrovanými povrchmi (tehlová stena, kov alebo tmavá tkanina) a kontrolovanou ulicovou atmosférou. Blokujte vonkajší hluk a udržujte atmosféru pod kontrolou na zachovanie jasnosti. Toto podsvietenie vytvára atmosféru bez umývania tváre.
- Osvetlenie a rámovanie: umiestnite kľúčové svetlo v 45 stupňoch, pridajte jemný plnič a jemné zadné svetlo na oddelenie. Udržte kameru v úrovni očí pre intímne spojenie s divákmi. Použite jednoduchý, konzistentný rám, ktorý zdôrazňuje vašu osobnosť a udržiava pozornosť na konverzácii.
- Rutina vybavenia: vyberte kardioidný mikrofón s veternou ochranou, kompaktný rekordér a základné slúchadlá na monitorovanie. Zamknite expozíciu a udržte úrovne zvuku okolo -12 až -6 dB. Ak pracujete s dvoma kamerami, použite jednu ohniskovú vzdialenosť a šetrite zoomy na prechody na podporu nálady namiesto distrakcie. Len jedna ohnisková vzdialenosť na kus pomáha vašemu publiku sledovať náladu a príbeh.
- Zvuk
- Zvukový reťazec: mikrofón → rekordér → editačné nastavenie; monitorujte úrovne, aby ste udržali reč jasnú a vyváženú s akoukoľvek pozadovou atmosférou. Nahrávajte niekoľko sekúnd tónu miestnosti na začiatku pre ľahké edity a spoľahlivé pozadie.
- Atmosféra a intímnosť: zachyťte jemnú uličnú textúru pod dialógom na pridanie hĺbky, ale udržte ju dosť mäkkú, aby ste sa vyhli maskovaniu reči. Použite vysokofrekvenčný filter na zníženie dunenia a jemnú kompresiu na vyhladenie dynamiky bez sploštenia osobnosti.
- Prístup k dodaniu: tempujte svoje línie pre jasnosť, používajte pauzy na odhalenie emócie a liešte komunikáciu ako dialóg s publikom. To vám pomáha udržať intímny tón pri zdieľaní niečoho úprimného a relatable.
- Post-produkcia
- Farba a grading: nakláňajte sa k noir nálade s kontrastom, kontrolovanými vrcholmi a desaturujúcim vzhľadom. Monochromatický alebo obmedzený paleta udržiava pozornosť na hlase a príbehu namiesto flashy vizuálov.
- Zmiešanie zvuku: zarovnajte dialóg s vizuálmi, aplikujte jemnú kompresiu (2:1 až 3:1) a udržte sibilanty pod kontrolou. Zabezpečte, aby hlas sedel nad atmosférou, zachovávajúc emocionálnu váhu a hĺbku. Pod 1 kHz sa vyhnite bahnu; nad 5 kHz zachovajte jasnosť pre spoluhlásky.
- Tempo príbehu: štruktúrujte klipy s jasným nastavením, konfliktom a reflexiou. Použite jednoduché prechody a selektívne strihy na udržanie toku, nechajúc atmosféru niesť náladu. Ukončite malou čerešničkou tým, že skončíte na ľudskej note, ktorá pozýva na zdieľanie a povzbudzuje sledovateľov na návrat pre viac.
Optimalizujte distribúciu: Náhľady, titulky, popisy a CTA
Navrhnite náhľady, ktoré sľubujú hodnotu do 3 sekúnd: použite detail subjektu, vysoký kontrast farieb a overlaye, ktoré komunikujú výsledok. Orežte rám, aby ste udržali viditeľné miesto a náladu. Vzhľad by mal zodpovedať značke a vízii; aplikujte paletu hanna na overlaye a okraje pre konzistentnosť. Pre tiktok uprednostnite vertikálne 9:16 a testujte tri varianty: A) detail tváre s odvážnym overlayom titulku; B) uličná scéna ukazujúca pohyb s jemným titulkou; C) záber produktu v použití s ostrým grafickým prvkom. Overlaye musia zostať čitateľné na mobile a vyhnúť sa preplneniu; pre aktíva pripravené na stiahnutie exportujte z šablón filmoras v PNG alebo JPEG pri 1280x720 pre horizontálne použitie alebo 1080x1920 pre vertikálne pohľady.
Náhľady a overlaye, ktoré chytajú pozornosť
Udržte overlaye stručné – nie viac ako dve slová – aby správa bola čitateľná v malých veľkostiach. Umiestnite subjekt mimo centra na odhalenie náznaku nastavenia, či už uličnej atmosféry alebo čistého štúdiového rohu, a zabezpečte, aby farebný vzhľad posilňoval osobnosť vašej značky. Použite orezie na odstránenie distrakcií, potom testujte tri varianty na dojmoch TikTok a porovnajte mieru preklikov do 48 hodín na výber víťaznej verzie.
Keď publikujete, udržte konzistentný vzhľad naprieč videami na budovanie rozpoznania; jemná textúra v overlayoch by mala ozývať náladový žáner, ktorý sledujete, pomáhajúc divákom okamžite spájať náladu s vašou značkou. Pre workflow uložte najlepší vykonávajúci náhľad na zdieľanom mieste pre tím a znovu ho použite s menšími úpravami, keď vydáte nový obsah tam medzi podobnými témami.
Titulky, popisy a CTA, ktoré konvertujú
Titulky by mali byť stručné, ideálne 40–60 znakov, a prednážať odmenu s kľúčovými slovami ako značka, vízia a tiktok. Použite numerický formát (5 krokov, 3 tipy) na nastavenie očakávaní a zahŕňajte emocionálny podnet na vedenie nálady diváka. Udržte jazyk aktívny a vyhnite sa vágnej formulácii; testujte dve alebo tri varianty a monitorujte, ktorá najlepšie rezonuje s vaším publikom tam a medzi vašimi sledovateľmi.
Popisový text rozširuje sľub náhľadu v dvoch až troch vetách, odkazuje na súvisiace videá a krátku poznámku o scéne alebo mieste. Zahŕňajte správy, ktoré posilňujú, prečo video záleží na cieľoch vášho publika, a pridajte odkaz na stiahnutie praktického zdroja, keď je relevantný. Ukončite jasným CTA: sledujte pre viac tipov, sledujte ďalšie alebo stiahnite kontrolný zoznam. Podporujte interakciu pozvaním komentárov k špecifickým scénam alebo pohybom a používajte prirodzený hlas, ktorý zapadá do značky a náladového žánru, ktorý pestujete.
Sledujte výsledky a iterujte: Metriky, spätná väzba a úpravy obsahu
Nastavte dvoj-týždňový analytický šprint a použite jednoduchú dashboard na porovnanie Shorts vs dlhých videí. Sledujte jadrové metriky denne: zhliadnutia, čas sledovania, retencia, miera dokončenia, uloženia, zdieľania a komentáre. Rozdeľte dáta podľa demografických rezov ako veková skupina a región, aby ste našli, kde vaša správa rezonuje. Použite tempo ako mierku tempa: identifikujte, kde publikum odchádza a kde sa hybnosť zvyšuje v ráme, potom aplikujte rýchle úpravy na nasledujúce vydanie. Pre každý kus udržte finálny cieľ v zornom poli: rast relevantnosti pri ochrane hlasu vašej značky.
tu je ako zhromaždiť reálnu spätnú väzbu z terénu: komentáre, ankety na webe a priame správy. sú to niekoľko signálov, ktoré môžete sledovať: zapojenie, dokončenie a zmeny v sentimente. Vytiahnite citáty a sentiment z komentárov na mapovanie k úprave obsahu. Monitorujte reakcie na mäkkú reč alebo priame oslovenie; to pomáha posilňovať vzťah s vaším publikom. Sledujte, ako tieto signály korelujú s konverziou na vašom webe, aby ste videli, či úpravy posúvajú ľudí k registrácii alebo nákupu.
tu je playbook úprav obsahu: Testujte dve varianty náhľadov, dve otvorenia a dva overlaye. Upravte rám: 16:9 pre niektoré klipy, 9:16 pre Shorts a harmonizujte s noir náladou pomocou jemnej hmly a backdropu západu slnka. Hairpin edity môžu zrýchliť tempo a udržať pozornosť pevnú medzi segmentmi. Poznámky k skriptovaniu: zarovnajte dialóg s misiou; udržte realitu poľa v zornom poli. Použite mäkký hlas v reči na podporu prístupnosti a nostalgického dotyku bez preháňania.
tu je praktická kadencia na uzavretie slučky: Keď pozorujete obrovský nárast v metrike, zamknite zmenu do ďalšieho finálneho strihu. Dokumentujte výsledok na webe a aktualizujte poznámky k predprodukcii, aby ďalšie natáčanie opakovalo úspech. Udržte vzťah s vaším publikom v centre pomoci obsahu, ktorý pôsobí autenticky a úprimne, a monitorujte indikátory, aby ste mohli rýchlo reagovať, ak úprava nedodáva.
Ready to leverage AI for your business?
Book a free strategy call — no strings attached.


