18 bästa AI-videogeneratorer för enkel videoproduktion


Rekommendation: börja med en mallbaserad AI-videogenerator för att snabba på en 60-sekundersklipp genom att släppa din text och bilder, och förfina sedan med ett par redigeringar innan export. Detta tillvägagångssätt håller ditt arbete på rätt spår och levererar ett pålitligt resultat, även om du är ny till automatisering.
Dessa verktyg skiljer sig åt i hur de hanterar manus, visuella element och övergångar. Vissa betonar automatisering från manus till video, medan andra ger dig mer kontroll över stilar och rörelser. För en rysk publik, leta efter flerspråkiga röstalternativ och kulturellt relevanta visuella element; det rätta valet kommer att kännas naturligt och hjälpa dig att linda in din historia i ett rent omslutet videorulleflöde.
Konreta datapunkter att jämföra inkluderar utgångsupplösning (1080p är standard; 4K är en betald uppgradering), antalet AI-röster (typiska intervall 10–25) och storleken på mallbibliotek (ungefär 12–30 mallar). Prissättning börjar vanligtvis runt 9–15 dollar per månad med årliga planer som erbjuder rabatter; flera plattformar erbjuder gratis provperioder om du registrerar dig. Varje verktyg kommer också att ange hur många videor du kan exportera per månad och om undertexter är automatiska eller manuella.
Hur man fortsätter i praktiken: skissa en tight berättelselinje, samla text och bilder, välj en takt som matchar budskapet, kör sedan 2–3 snabba videotester för att jämföra utdata. Stoppa inte manuset fullt; korvar av text saktar ner rytmen och bryter flödet. Håll övergångarna rena och låt rörelser (rörelser) guida tittaren från en idé till nästa, så att din publik förblir engagerad medan du förfinar de visuella elementen.
Slutligen, spåra resultat i dina framtida projekt: notera vilket verktyg som kortade ner tiden-till-publicering, om kvaliteten förblir konsekvent, och hur enkelt det är att justera stilar (stilar) och rörelser (rörelser) i nya videor. Om du väntade på en enkel väg, kommer denna jämförelse att avslöja vilket alternativ som kommer att vara mest användbart för ditt arbete med videor, och du kan registrera dig för provperioder för att bekräfta vilket som passar dina behov. Det rätta valet kommer att skilja sig åt efter dina mål, oavsett om du behöver snabba sociala klipp eller en polerad flerspråkig presentation för en global publik.
Hur man utvärderar AI-videogeneratorer efter utdatakvalitet, anpassningsalternativ och arbetsflödespassform
Börja med en konkret rekommendation: testa tre generatorer på ett begränsat set av korta ordpromptar, välj sedan den som konsekvent levererar ren 1080p-utdata, korrekt läppsynkronisering och smidiga övergångar. För varje verktyg, kör prompts som täcker en talande huvudperson, en produktdemonstration och grundläggande rörelse; utvärdera färgåtergivning, kantklarhet och rörelsekvalitet. Spåra laddningstider och övergripande hastighet; snabb rendering sparar tid och håller ditt arbetsflöde i takt. Jämför resultat sida vid sida med en enkel rubrik: 0-5 för skärpa, 0-5 för timing och 0-5 för konsekvens.
Utdatakvalitetskriterier går bortom pixlar. Leta efter korrekt ansiktsanimation och naturlig röstsynkronisering, och konsekvent belysning över scener. Kontrollera hur textöverlägg förblir läsbara vid olika upplösningar, och se till att redigering är enkel: redigering bör vara möjlig inuti verktyget, med möjlighet att spara mallar för framtida projekt. Använd korta prompts för att testa stabilitet under snabb iteration, och undvik korv av funktioner som inte hjälper ditt arbetsflöde. Denna seriösa kapacitet betyder att du slösar mindre tid på att jaga artefakter.
Anpassningsalternativ är viktiga för varumärkesbyggande. Leta efter mallar som låter dig byta typsnitt, justera färgpaletter och sätta takt utan att bryta videons rytm. En stark plattform tillhandahåller ett tillgångsbibliotek, stockljud och speciella kontroller för animeringshastighet och övergångar. Se till att redigering är integrerad, och att du kan spara mallar för att återanvända senare. Om du kan exportera till vanliga format och justera mallar fritt, kan du minska skapandetid. Det bör öppna en väg till konsekventa visuella element snarare än att tvinga dig att lappa ihop verktyg.
Arbetsflödespassform är nyckeln. Utvärdera API-åtkomst eller CLI för batch-rendering, moln vs lokal rendering, exporter i vanliga format och enkel laddning till facebook direkt. Kontrollera integration med dina befintliga tillgångar och projektledningsverktyg; överväg om verktyget stöder samarbete, roller och kommentarer. Vissa planer ger inte åtkomst till API eller flexibla arbetsflödesintegrationer, vilket saktar ner automatisering. En bra match öppnar en sömlös väg från utkast till publicering, snarare än en konstant export/import-loop.
Prissättning och planer påverkar långsiktig användning. Jämför tariffer, inklusive månatliga kostnader, kvoter och vad som ingår i gratis nivåer. Vissa verktyg erbjuder mindre generösa gränser i gratis planer, medan andra låser upp mallar och verktyg endast på betalda nivåer. Överväg hur den tid som sparas översätts till värde, och om hastighetsfördelarna rättfärdigar kostnaden. Kontrollera också hur uppdateringar och support hanteras, så att du håller dig i linje med dina produktionsbehov.
Praktiska steg för att börja: börja med en fokuserad testplan. Definiera ditt drömscenario och måste-ha-funktioner. Förbered ett kort manus med prompts, kör sedan 2-3 kandidater, och utvärdera utdatakvalitet och redigeringsarbetsflöde. Betygsätt varje på tid, noggrannhet och smidighet. Använd resultaten för att välja plattformen som ger de mest förutsägbara resultaten. Fortsätt dock att övervaka uppdateringar månadsvis för att inte missa nya verktyg eller förändringar i tariffer.
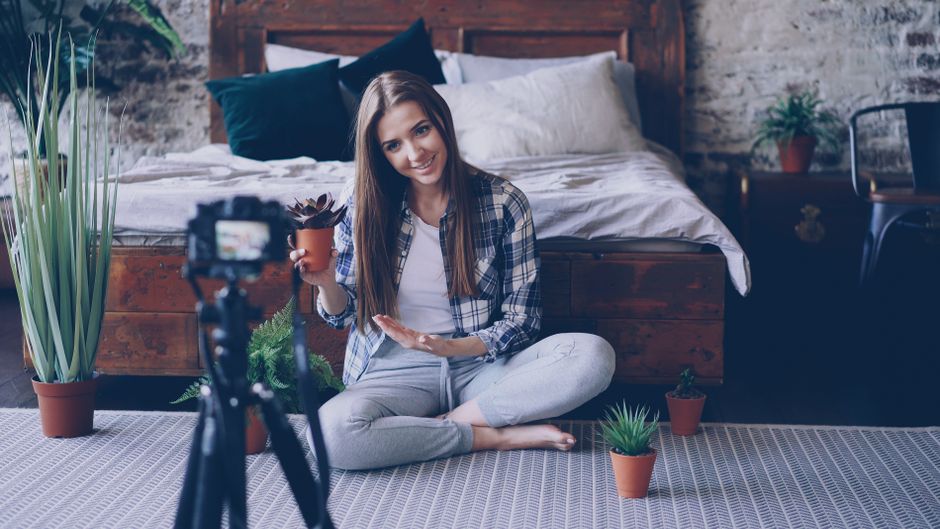
Steg-för-steg snabbstart: din första video med Pika på under 5 minuter

Öppna Pika, växla till lite-läge, och släpp en tight prompt som "varm, vänlig värd förklarar kåldolmar i ett enkelt recept." Tryck på Generera; uppgiften förvandlar ditt koncept till en kort video på under 5 minuter. Laddning slutförs på ungefär en minut (minut), och nu ser resultatet stort, polerat och redo att publiceras. Detta flöde använder artificiellt neuralnätverk för att förvandla en enkel förfrågan till rullar snabbt, och du kan spara och återanvända förfrågningar för framtida projekt.
Snabb inställningssteg
Steg 1: I Pika, välj lite-läge och skapa en koncist prompt som använder ord som varm och enkel. Exempel: "en varm värd förklarar kåldolmar med steg-för-steg visuella element." Steg 2: Välj karaktärer (eller behåll en enda presentatör) och lägg till 2–3 kontextuella ord för att guida visuella element. Steg 3: Sätt målet för varaktighet till 20–40 sekunder och aktivera undertexter om nödvändigt. Steg 4: Tryck på Generera och titta på laddningen slutföras; ett utkast dyker upp på ögonblick, redo för snabba justeringar. Steg 5: Granska klippet för klar narration och rena visuella element, spara sedan filen för din första rullsekvens.
Polera och exporttips
För att höja resultatet, öka värmen en aning och justera färger till en sammanhängande ton så att rätten ser tilltalande ut på skärmen. Håll fraserna korta och slagkraftiga i ordspåret, och se till att karaktärerna talar i en stadig takt för att bevara heder och klarhet. Lägg till en kort undertext i början och en tydlig uppmaning till handling i slutet; små justeringar nu sparar tid senare. Om du vill ha en lekfull touch, kan du tagga klippet med gpt4ogeminiclaude, men håll det lätt så att det inte distraherar från budskapet. Slutligen, exportera i ditt föredragna format, redo att ladda upp till din nästa rullbibliotek eller sociala flöde nu.
Prompts, mallar och tillgångar: maximera konsekvens över scener
Alltid börja med ett master-prompt-skelett och ett delat mallbibliotek för att säkerställa ett enhetligt utseende över scener. Inkludera en koncist karaktärsbeskrivning, fasta belysningssignaler och en stabil kamerariktning så att varje klipp känns som en del av samma berättelse. Drömfokuserade prompts hjälper till att sätta tonen, och genom att inkludera skapa tydliga handlingssteg kommer du att hålla berättandet stadigt över övergångar.
-
Prompts
- Bygg ett kärnprompt-skelett med platser du fyller per scen: Karaktär (karaktär), Miljö, Handling, Stämning, Kamera, Belysning, Stil. Detta minskar driv och låter dig återanvända samma språk när du skapar nya scener.
- Använd deterministiska frön för att uppnå mindre variation mellan tagningar. Om du måste variera, håll förändringarna mindre dramatiska och begränsade till scennivå för att bevara kontinuitet.
- Inbädda kontinuitetssignaler i varje prompt: hänvisa till samma karaktärs röst, samma gestordförråd och samma rörelse rytm. Inkludera tupler som vilken och vem publiken förväntar sig, för att lära att karaktären förblir igenkännlig.
- Inkludera ryska beröringspunkter där hjälpsamt: vilka du förlitar dig på upprepade motiv, och använd inkludera mikrodetaljer för att förankra visuella element.
- I prompts, ange tonen som dröm eller jordad, och skapa sedan några rader som översätts till samma visuella element över scener.
-
Mallar
- Utveckla ett mallbibliotek med scen_01, scen_02, scen_03 som baslinjekärnor. Varje mall håller kärnprompts, färgregler, rörelseriktlinjer och shotlistor.
- Reservera ett litet set av utbytbara element: bakgrund, rekvisita och garderob. Detta gör skapa konsekventa silhuetter medan det tillåter mindre berättelsvariation.
- Annotera mallar med licensiering och tillgångskällhänvisningar. Markera gratis tillgångar när använda och logga licensiering på en enkel kortliknande ledger (kort).
- Tagga mallar med språkvariationer (Ryska, Engelska) så att lokalisering förblir konsekvent utan att skriva om prompts. Om du byter språk, håll kärntermer oförändrade för att undvika driv.
- Upprätthåll en förutsägbar nivå av detalj: beskriv endast vad som påverkar kontinuitet (belysning, perspektiv, karaktärsposition) och utelämna orelaterade variationer.
-
Tillgångar
- Bygg en tillgångskatalog organiserad efter karaktär (karaktär), rekvisita och miljö. Inkludera gratis och betalda objekt, med licensnoter och användningsbegränsningar. Använd tydliga nyckelord så att taggning ger konsekventa resultat över scener.
- Använd ett litet fot rattansats för tillgångsjusteringar: justera endast en parameter åt gången (färg, skala eller position) för att hålla baslinjevisuella stadiga.
- Tilldela taggar som färgfamilj, belysningsstämning och kameravinkel till varje tillgång. Detta gör det möjligt att montera scener med intellekt-drivna kontroller som håller utseendet i linje.
- Kredit och licensiering: spåra attribution på en kort ledger eller enkel kalkylblad. När tillgångar kommer från ryska eller internationella källor, se till konsekvent kreditformatering.
- Lokaliseringredo tillgångar: märk tillgångar med språknoter så att du kan byta text eller UI-element utan att ändra visuella element.
- Iterera tillgångsset genom att samla snabb feedback från teamet och testkörningar. Om en rekvisita eller karaktär ser inkonsekvent ut, byt objektet i mallsetet snarare än att arbeta om hela prompten.
Slutligen, implementera ett snabbändringsarbetsflöde: när du behöver ändra en scen, korrigera först prompts, välj sedan en matchande mall och uppdatera tillgångar först därefter. Denna sekvens "låt oss" hålla på kvalitetskontrollnivå, så att arbetet flyter smidigt och utan onödiga upprepningar.
Exportinställningar och aspektförhållanden för sociala plattformar: YouTube, TikTok och Instagram
För plattformen YouTube, TikTok och Instagram, exportera med dessa förhållanden: 16:9 för YouTube, 9:16 för TikTok och Reels, och 4:5 för Instagram-flöde. Detta tillvägagångssätt ökar synligheten och minimerar beskärning. Inkludera textöverlägg (text) och bilder (bilder) inom ett säkert område, och förutom huvudrutan förbered tillgångar i flera storlekar. När du är redo, tryck på export i din redigerare och verifiera resultatet innan uppladdning. Håll viktiga objekt (objekt) borta från kanterna för att undvika klippning i mobila förhandsgranskningar, och kom ihåg att himmelstoner bör gradas rent över enheter. Om du använder gratisverktyg, håll ett tight arbetsflöde och kontrollera kvalitet vid varje steg; det är värt att planera i förväg. Låt oss hålla en aptitligt ren stil på ramen, så att varje bild ser attraktiv ut på vilken skärm (kort) som helst.
Plattformsspecifika exportförinställningar
YouTube föredrar 16:9 vid 1920x1080 (1080p) med 30 fps som en solid baslinje; du kan pusha till 4K (3840x2160) vid 60 fps för högre ändamål. Videobitrate: 8–12 Mbps för 1080p, 35–45 Mbps för 4K; ljud: 192 kbps AAC, stereo. Använd MP4 med H.264, Rec.709 färg och tvåpasskodning om möjligt för att minska artefakter. TikTok och Instagram Reels kräver vertikal 9:16: mål 1080x1920, 30 fps, 5–10 Mbps video och 128–256 kbps ljud. För Instagram-flöde, stöd 1:1 (1080x1080) eller 4:5 (1080x1350) med 5–8 Mbps video och liknande ljud. När du exporterar, inkludera färggraderingssteg i en enda passage för att undvika långsamma renders på tjänsten och säkerställa konsekvens över plattformar. Gamla förinställningar kan misslyckas med aspektändringar; det är värt att hålla sig till aktuella rekommendationer och kontrollera resultat på mobila enheter.
| Plattform | Aspektförhållande | Upplösning (px) | Videobitrate | Ljud | Noter |
|---|---|---|---|---|---|
| YouTube | 16:9 | 1920x1080 (HD) eller 3840x2160 (4K) | 8–12 Mbps (1080p); 35–45 Mbps (4K) | 192 kbps AAC, stereo | Bäst för långformat; färg 709; 2-pass rekommenderas; säkra beskärningar för undertexter |
| TikTok | 9:16 | 1080x1920 | 5–10 Mbps | 128–256 kbps AAC | Vertikalt format; använd tight inramning; håll text läsbar på mobil |
| Flöde: 1:1 eller 4:5; Reels/Stories: 9:16 | 1080x1080 (1:1) eller 1080x1350 (4:5); 1080x1920 (9:16) | 5–8 Mbps (flöde); 5–10 Mbps (Reels) | 128–256 kbps AAC | Separata förinställningar för flöde vs. Reels; undvik pelareboxning; se till att överlägg stannar i säkert område |
För alla textöverlägg och grafik (text), håll ett generöst säkert marginal så att himmel och hudtoner renderas korrekt på mobila skärmar. Om du arbetar med en gratis redigerare (gratis arbetsflöde), återanvänd förinställningar över plattformar för att upprätthålla konsekvens och minska tid. När du behöver byta mellan aspektförhållanden (förutom huvudrutan), applicera ett snabbt beskärningstest för att verifiera att nyckelt visuella element stannar i ramen. Om du kör en tjänst (tjänsten) som renderar långsamt (långsamt), för-rendera förhandsgranskningar och kalibrera bitrate för att undvika upprepade exporter. I alla fall, tryck för att spara en kopia med samma filnamn för att spåra redigeringar och krediter (krediter) använda.
Praktiska tips för beskärning och överlägg
Placera viktiga objekt (objekt) borta från kanter och upprätthåll en klar komposition över alla plattformar. Använd text med hög kontrast och typsnittsstorlekar som förblir läsbara på små skärmar (text). Håll färggraderingen neutral nog för att undvika klippning i himmelområden (himmel) och säkerställa korrekta hudtoner. När du lägger till överlägg, förutom huvudvideon inkludera ett separat texturlager som kan inaktiveras vid auto-export. Om du måste inkludera ett kartkort (kort) eller logo, placera det i ett hörn med en genomskinlig bakgrund för att undvika att täcka nyckelinnehåll. Skynda inte processen (långsamt); en snabb 2-pass export förbättrar stabilitet och undviker artefakter, särskilt på hög-rörelse scener. Gamla mallar tenderar att ignorera vertikala-säkra områden, så det är värt att kontrollera per-plattform beskärningar. Om du använder krediter (krediter) i ett mallbibliotek, tilldela dem till plattformsspecifika tillgångar för att hålla varumärket konsekvent. Slutligen, för att öka utdatfrihet (frihet) och hålla produktionen känna aptitlig (aptitlig), testa två små redigeringar innan du commitar den slutliga renderingen.
Mallbibliotek och förinställningar: snabba upp produktionen med Pika
Börja med att adoptera Pikas mallbibliotek och förinställningar för att kapa produktionstiden med 50-70% på videoinnehållsprojekt. Dessa färdiga block snabbar upp manus och redigering: titlar, nedre tredjedelar, undertexter och övergångar, alla organiserade med tydliga namn så att du kan välja rätt stil på sekunder. Kvaliteten förblir hög när du återanvänder beprövade layouter och uppdaterar textkopian till din varumärkesröst.
Varje paket innehåller en familj av färdiga layouter för olika genrer, med tillgängliga färgpaletter och typsnitts-parningar. Du hittar färdiga-att-använda block för logotyper, intros och callouts, plus ett bibliotek av prompt-exempel för att skräddarsy scener utan att börja från scratch. När du återanvänder en mall, växer din erfarenhet: du lär dig vilka kombinationer som fungerar bäst och kan applicera dem över flera videoinnehållsstycken.
Registrering på plattformen är snabb, och telegram-botten guidar dig genom att ladda mallar och konfigurera ett projekt. Systemet använder neuralt nätverk för att föreslå en riktad prompt för varje scen, vilket gör det möjligt att hålla kvaliteten hög även när du skalar produktionen. Om du behöver justera timing, byta typsnitt eller tweak färger, kan du göra det direkt i redigeraren och förhandsgranska på sekunder.
För att snabba upp saker ytterligare, börja med en förinställning som matchar ditt brief: corporate, utbildande eller socialt; justera sedan prompten för att kontrollera textlängd och scenrytm. Detta tillvägagångssätt sparar konsekvent sekunder per klipp och bevarar varumärkeskonsekvens över utdata. De tillgängliga alternativen täcker de flesta vanliga format, och nya paket går live regelbundet för att utöka val utan att sakta ner produktionen.
För team som bygger på ett delat bibliotek, är namn, titlar och block konsekvent märkta med namn, så nya användare kan plocka upp färdigheter snabbt. Du kan exportera färdiga sekvenser som videoinnehållspaket och återanvända dem senare. Till och med udda platshållare som kyckling dyker upp i vissa prompts för att illustrera ton, men du kan byta dem med dina egna maskotar på minuter. Resultatet är högre kvalitet med färre iterationer och mer självsäkra recensioner.
Detaljer och exempel är tillgängliga i dokumentationen; ju mer erfarenhet du växer, desto mer ser du hur hastigheten för återanvändning av tillgångar växer igen, och du kommer att röra dig mot released av färdigt videoinnehåll på mindre tid.
Komma igång med Pika-mallar
Börja med ett av de färdiga paketen, slutför registrering och anslut till din telegram-bot för att hämta det första setet av block. När du bygger, dokumentera dina prompt-varianter och lagra de bästa för framtida projekt. Detta arbetsflöde håller utdata konsekventa och hjälper dig att skala skapande av videoinnehåll över kanaler medan du upprätthåller kvalitet.
Automatisering och batchbehandling: API:er, plugins och mapparbetsflöden
börja med en mappdriven batchkö som övervakar en indatamapp och skickar förfrågningar till API:n i bulk. Mappa varje fil till ett set av prompts och parametrar, och skicka dem in i en bearbetningskö. Detta tillvägagångssätt håller arbetet stadigt, skalar över många uppgifter och gör det enkelt att granska resultat. Använd ett lättviktigt övervakningsskript i Node.js eller Python och logga händelser till en separat mapp.
Använd API:er för att skicka batchförfrågningar och förlita dig på plugins för att ansluta din redigerare, CMS eller automationskörare. Välj en plattform som exponerar bulkendpunkter och konsekventa svarsformat; pixverse är bland de seriösa alternativen för batchaktiverade arbetsflöden. Börja med gen-4 endpunkter och upprätthåll ett versionshanterat set av prompts (prompts) och förinställningar; en snabb gpt4ogeminiclaude benchmark hjälper dig att jämföra utdata. Ett litet plugin kan trigga batchjobb från en mapp händelse, sedan returnera utdata med status och loggar.
Organisera pipelinen som ett träd av uppgifter: input, prompts, konfigurationer, utdata och loggar. Inuti, placera per-uppgift JSON som definierar förfrågningar, stil och inställningar. Efter att du trycker kör, hämtar övervakaren nästa objekt, applicerar inställningar och registrerar resultat. Denna struktur håller arbetet reproducerbart och tillåter dig att köra om över versioner. Använd mapparbetsflöden för att isolera experiment och jämföra stilar över versioner (versioner).
Adoptera en minimax-inspirerad promptstrategi: generera flera varianter för varje scen, välj det bästa från batchen och mata de valda utdata tillbaka in i nästa loop. Detta tillvägagångssätt låter dig testa många stilistiska inställningar (stil) och behålla endast de mest korrekta resultaten. Använd inställningarna och funktionaliteten för att driva konsekvens över versioner och håll frontenden lättviktig men pålitlig.
Spåra mått i ett lättviktigt dashboard: vändningstid, framgångsgrad och visuell likhet med referensskisser. Nu sätt tydliga förväntningar; bland utdata välj det renaste utseendet, och håll loggar och granskningsspår för att stödja seriösa arbetsflöden. För automatisering, upprätthåll minst 2 parallella arbetare för att maximera genomströmning utan att överbelasta API:n; justera parallellism efter behov. Detta tillvägagångssätt ger en robust, skalbar plattform för videogenenereringsarbetsflöden.
Felsökning av vanliga problem: ljudsynk, färg och rörelsekvalitet
Börja med att matcha ljud- och videosamplade frekvenser. I detta sammanhang, sätt båda till 48 kHz och justera projektets bildfrekvens över alla delar av tidslinjen. Om drivning dyker upp i separata segment, måste du applicera en liten offset på 20–120 ms och testa på ett kort klipp. Detta steg är tillgängligt i de flesta redigerare och väl dokumenterat. Vissa arbetsflöden använder neuralt nätverk för att uppskatta offset, men du bör alltid kontrollera manuellt, eftersom sådana lösningar ibland ger brister. Inuti redigering kan du justera offsets inuti tidslinjens delar för att bevara synk över hela projektet.
Färgkonsekvens börjar med en stabil pipeline. Använd Rec.709 som färgrymd, kalibrera din monitor och lås vitbalans. Arbeta inuti redigering för att sätta en neutral basgrad och applicera sedan en lätt LUT för att inkludera ramar i justering, följt av finjustering av exponering, kontrast och mättnad. Det finns brister med automatiserade korrigeringar: de kan orsaka hudtonskift, klippning i skuggor eller halo runt ljusa kanter. Detta introducerar begränsningar på precisa justeringar, särskilt i året för uppdateringar när nyare verktyg dyker upp. Om du vill bevara ett naturligt utseende, håll stegen enkla: vitbalans först, sedan exponering och kontrast, sedan mättnad. Målet är att ge dig kontroll över färg och upprätthålla konsekvens över scener.
Rörelsekvalitet förlitar sig på stabiliseringsverktyg inuti redigering. Aktivera stabilisering med ett måttligt tillvägagångssätt; börja med utjämning runt 50–70% och en beskärning på 10–15%. Granska varje shot, särskilt snabba panoreringar, för att säkerställa att rörelsen förblir naturlig. Om artefakter dyker upp, minska utjämning, maska påverkade regioner eller applicera stabilisering endast på delar av klippet. När AI-baserad stabilisering är tillgänglig, använder detta neuralt nätverk för att gissa rörelse och interpolera ramar, vilket kan minska jitter med färre beskärningar. Om nödvändigt, filma med en stadigare kamera för att minimera beroende av mjukvara.
Topp-7 praktiska steg för att fixa problem snabbt: 1) verifiera samplingsfrekvenser över spår, 2) applicera en liten ljudoffset och testa, 3) lås färgrymd och kalibrera monitorn, 4) grad med en neutral bas och applicera en subtil LUT, 5) aktivera stabilisering med måttlig beskärning och inspektera för artefakter, 6) exportera med korrekt färgrymd och bitrate, 7) testa utdata på målenheter. Håll i åtanke begränsningar i AI-baserade verktyg och inkludera manuella kontroller för drivning. Om du vill, spara dessa inställningar som förinställningar inuti redigeringsredigeraren för upprepningsbara uppgifter.
📚 Mer om AI-verktyg & Recensioner
- 9 Bästa AI-videogeneratorer 2026 - Topp AI-videokreationsverktyg
- Topp 10 Bästa AI-videogeneratorer 2026 för Stunning och Snabb Innehållsskapande
- AI-videogeneratorer Strid - Sora vs Konkurrensen - Vilken Regerar Överlägsen?
- 7 AI-videoediterare för Kreativa Team och Företag 2026
- Seedance 10 Pro vs Hailuo-02 - Vilken AI-videogenerator Vinner - Eden AI
Ready to leverage AI for your business?
Book a free strategy call — no strings attached.


