Як створити мультфільм за допомогою Veo 3 - Покроковий посібник з анімації Google AI

Рекомендація: Відкрийте VEO 3 і зіставте один крок, щоб перевірити робочий процес для мультфільму з Google AI Animation. Визначте цілі зацікавлених сторін, підготуйте активи зображення, і встановіть базовий стиль. Ви знаєте, що цей метод допомагає отримати швидкий зворотний зв'язок і закріплює безперервні покращення.
Крок 1: Визначте концепцію та оберіть візуальний стиль, який відповідає вашій аудиторії. Зафіксуйте цілі зацікавлених сторін і окресліть елементи, що рухають історію, включаючи кількох персонажів і сетинг. Ці технології дозволяють швидке експериментування і допомагають зрозуміти, які візуали переходять в анімацію, і як зображення виглядатиме в русі. Якщо ви хочете зберегти рух плавним, спочатку сплануйте ключові кадри, щоб потік йшов гладко.
Крок 2: Зберіть активи для проекту. Створіть чисту лінійну графіку, послідовний колір і масштабованих персонажів. Експортуйте малюнки як послідовності PNG або векторні шари, і назвіть їх за функцією (персонаж, фон, реквізит). Це зменшує правки пізніше і зберігає робочий процес безперервним, коли ви будуєте сцену. Включіть простий лог активів, щоб прискорити правки і допомогти зацікавленим сторонам відстежувати деталі.
Крок 3: Налаштуйте VEO 3 з функціями Google AI Animation. Завантажте ваші активи, визначте правила руху для ключових кадрів, і дозвольте AI генерувати проміжні кадри. Перевірте безперервність через кадри і відрегулюйте часування, щоб уникнути тремтіння. Використовуйте ці техніки, щоб контролювати темп і тримати анімацію плавною. Якщо кадр виходить з стилю, підкорегуйте підказки і перезапустіть швидкий прохід, поки він не вирівняється з базовим зображенням, і занотуйте, яка підказка встановлює тон, яка яка інформує підхід. Цей процес залишається наче простим, поки ви ітеруєте.
Крок 4: Додайте аудіодоріжку та ефекти. Якщо ви прагнете ASMR-атмосфери, включіть підказки asmr-відео у фон і синхронізуйте lip-sync з діалогом. Тримайте рівні аудіо чіткими і уникайте маскування деталей у візуалах. Ви можете додати тонкий кімнатний тон і навколишні звуки, щоб підтримати сцену, не перевантажуючи зображення.
Крок 5: Перегляньте з зацікавленими сторонами. Зберіть деталі про те, що працює і що коригувати. Ітеруйте неодноразово, щоб досягти стабільного, безперервного вигляду через сцени. Потім рендерите і експортуйте вихід як готову послідовність зображення для публікації чи презентації аудиторії життя, забезпечуючи доступність і читабельність для різноманітних аудиторій. Якщо кадр потребує правки, занотуйте зміну у вашому лозі і поверніться для швидкого проходу.
Ці кроки допомагають перетворити концепцію на відшліфований мультфільм з VEO 3, узгоджуючи з робочими процесами Google AI Animation і доставляючи чіткий, тестовий результат для будь-якої зацікавленої сторони. Фокусуйтеся на важливих деталях і отриманні послідовних результатів кадр за кадром, і продовжуйте вдосконалювати, поки результат не відповідатиме вашим цілям.
Налаштуйте VEO 3 і підключіть до робочого простору Google AI Animation
Встановіть VEO 3 і підключіть до робочого простору Google AI Animation, потім створіть новий проект і узгодьте його з вашим сховищем Google Cloud для централізованого керування активами. Фокусуйтеся на зручності використання; це може стати такою основою, що живить творчий вивід для аудиторії. Використовуйте демонстраційний набір даних, щоб перевірити робочий процес перед масштабуванням до виробництва.
-
Підготуйте доступ і передумови:
- Перевірте, чи у вас є права адміністратора в Google Cloud і VEO 3 встановлено на робочій станції з щонайменше 8 ГБ RAM і виділеним GPU для швидкості.
- Увімкніть API Google AI Animation у консолі Google Cloud і згенеруйте набір облікових даних OAuth для VEO 3.
- Очистіть директорію робочого простору з підпапками assets/, prompts/, renders/ і outputs/, щоб тримати чистий контекст для швидшої співпраці.
-
Підключіть VEO 3 до Google AI Animation:
- Відкрийте VEO 3, оберіть Integrations > Google AI Animation, і увійдіть з вашим обліковим записом Google.
- Авторизуйте необхідні області, оберіть цільовий робочий простір, і оберіть шаблон проекту за замовчуванням, щоб прискорити введення в курс справи.
- Підтвердіть синхронізацію з Google Drive або Cloud Storage, щоб активи та рендери публікувалися автоматично в робочому просторі.
-
Визначте структуру проекту та називання:
- Назвіть проект чітко (наприклад, Cartoon_Studio_Test) і встановіть теги для швидкого пошуку, такі як creative, rollen, і пресети підказок.
- Встановіть стандартну карту папок: assets/ (videoweb, зображень), prompts/, scenes/, renders/ і outputs/, щоб підтримувати кілька глав і ролики.
- Документуйте конвенцію називання в посібнику, щоб прискорити введення в курс справи для нового клієнта чи нового члена команди.
-
Імпортуйте та організовуйте активи:
- Підключіться до бібліотек videoweb і імпортуйте зображення пакетами, тримаючи кожен пакет під 50 активами для швидших попередніх переглядів.
- Прикріпіть звукові активи до проекту для швидкого прослуховування; маркуйте аудіофайли з чіткими метаданими, щоб підтримувати аналітику і пошук.
- Для тестів створіть демонстраційний набір, що включає прості сцени мультиплікації, щоб перевірити часування анімації та сумісність активів.
-
Налаштуйте підказки та контекст:
- Підготуйте базовий шаблон підказки (prompt), що описує контекст сцени, дії та рухи камери; зберігайте його під prompts/ для повторного використання.
- Включіть варіації, використовуючи кілька підказок, щоб протестувати, як система інтерпретує контекст і взаємодію, такі як рух персонажа, паралакс фону, і звукові підказки.
- Використовуйте приклади, які можуть застосовуватися до такого рівня деталізації, забезпечуючи, щоб до яких ваша команда може швидко адаптуватися під жорсткими термінами.
-
Налаштуйте демонстраційні сцени та виходи:
- Створіть короткий демонстраційний ріл (demo) з 2–3 короткими роликами, щоб перевірити швидкість рендерингу, вірність кольору та вірність імпорту активів.
- Встановіть профілі виходу для роздільної здатності та стиснення; створіть кілька варіантів (multiple), щоб відповідати вимогам веб, мобільного та потокового videoweb.
- Увімкніть перевірки звуку та синхронізацію часової шкали, щоб забезпечити, що аудіо узгоджується з кадрами анімації в кожному рендері.
-
Аналітика та моніторинг:
- Увімкніть аналітику, щоб відстежувати часи рендерингу, завантаження активів і часи виконання підказок; переглядайте панелі керування, щоб виявити вузькі місця.
- Створіть щоденний підсумок для стейкхолдерів аудиторії, виділяючи віхи, метрики залучення та потенційні правки підказок чи активів.
-
Співпраця та цикл зворотного зв'язку:
- Запросіть членів команди та клієнтів до робочого простору з контрольованими дозволами; використовуйте коментарі на сценах, щоб зафіксувати, хто запитував зміни і чому.
- Встановіть швидкий цикл зворотного зв'язку навколо точок взаємодії в сценах, таких як жести персонажів чи коригування часування, щоб підтримувати імпульс.
- Документуйте рішення і оновлюйте файли підказок та контексту відповідно, щоб підтримувати coherent творчу нитку через епізоди.
-
Перший запуск і план ітерації:
- Запустіть першу ітерацію з сценою 10–20 секунд, щоб перевірити цілісність активів, інтерпретацію підказок і якість виходу.
- Перегляньте в команді і зафіксуйте уроки в посібнику для майбутніх проектів; узгодьте передбачуваний ритм для ітерацій і релізів.
- Підготуйте короткий план розширення до повного набору епізодів, використовуючи уроки з цього початкового налаштування, щоб інформувати творчий напрямок і пропускну здатність виробництва.
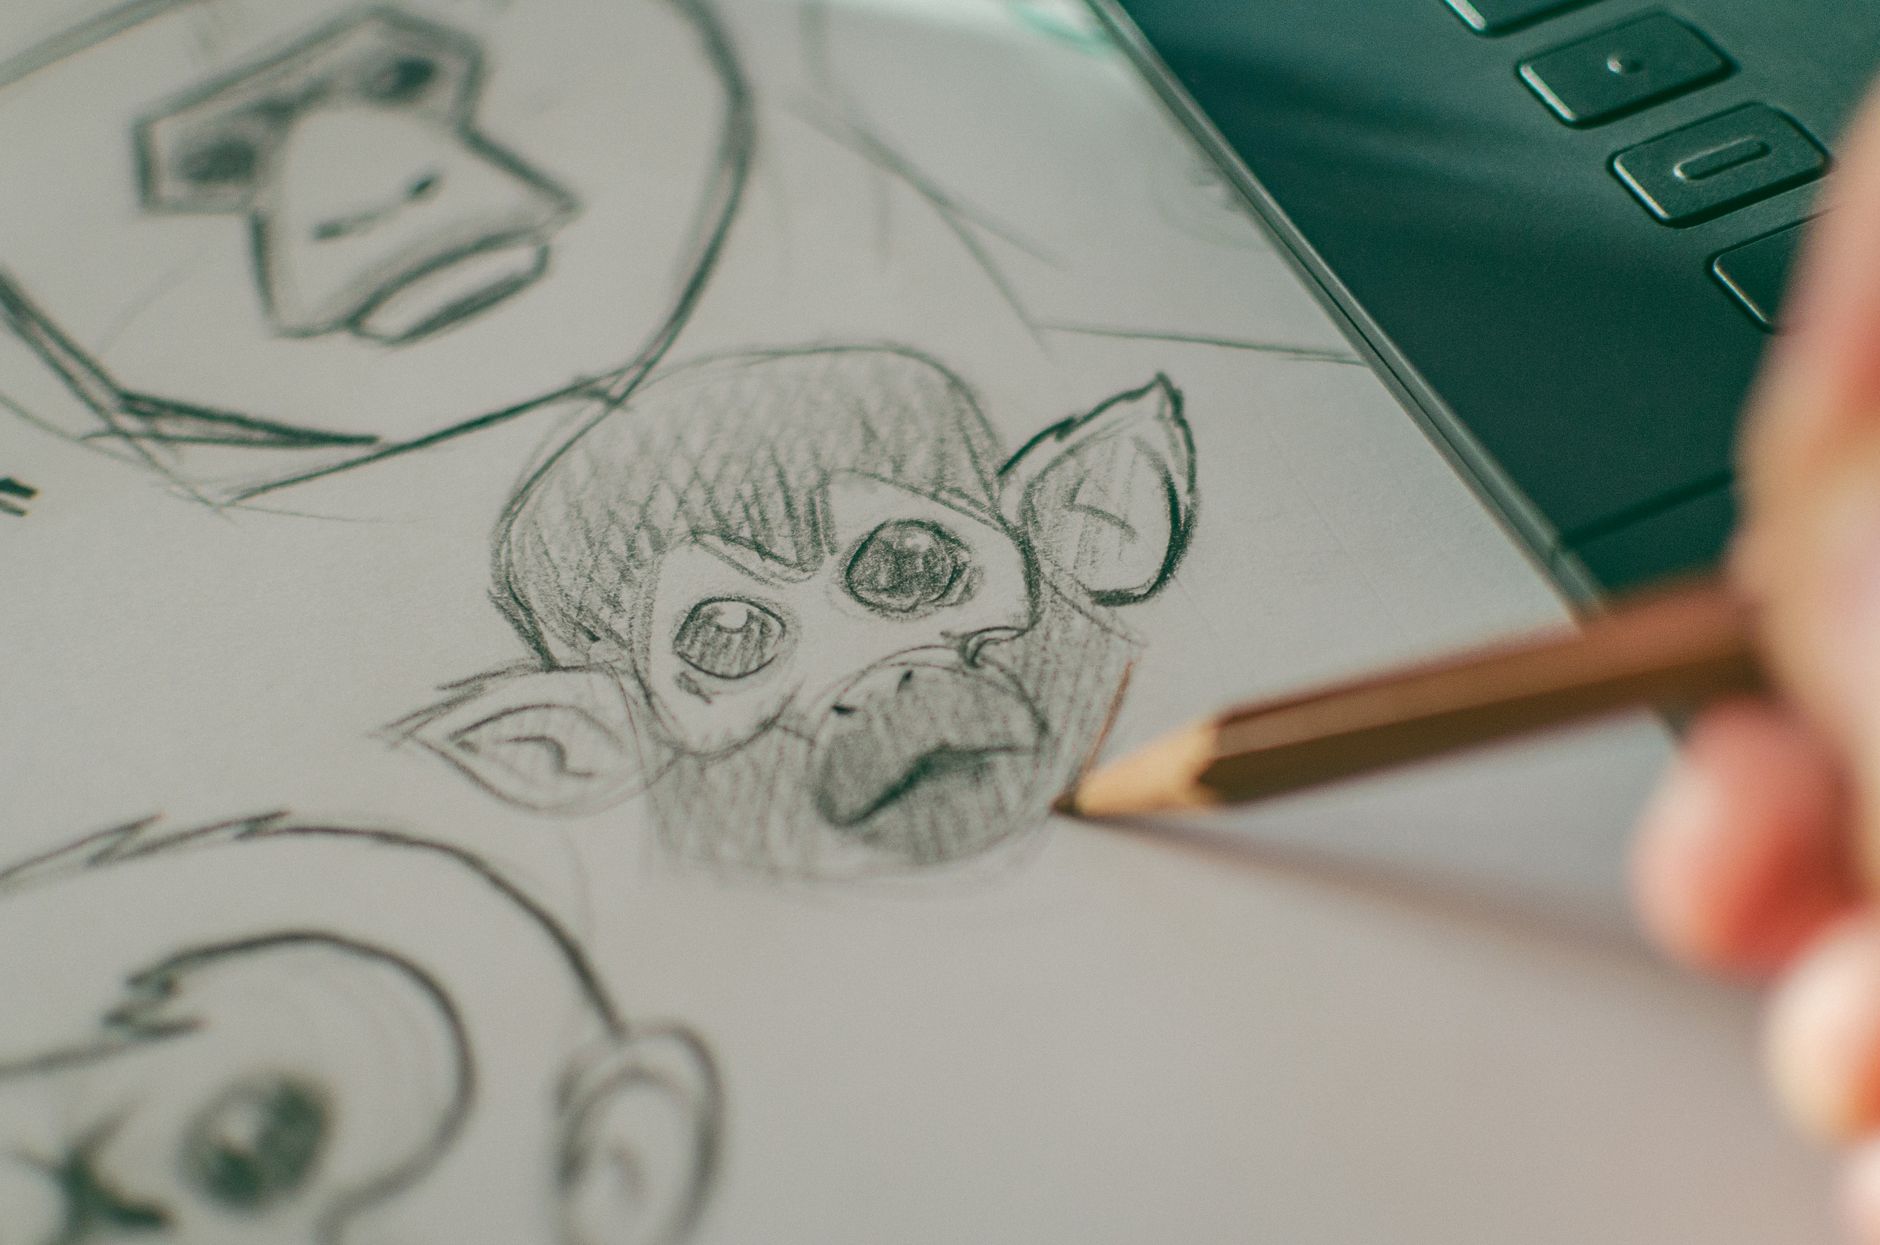
Підготуйте вихідні активи: ескізи, референси та аудіо
Організуйте ваші створення в одній папці проекту, з підпапкою, названою створення, щоб тримати ескізи, референси та аудіо. Тримайте ескізи високої роздільної здатності (PNG/TIF, 300 dpi) і зберігайте референси як JPEG/PNG. Архівуйте аудіо як WAV для оригіналів і MP3-проксі для швидких попередніх переглядів. Використовуйте послідовну схему називання, як scene01_charA_sketch.png, scene01_ref.jpg, scene01_audio.wav, щоб підтримувати вашому системі робочий процес. Прикріпіть нотатку метаданих для кожного активу, що перелічує настрій, темп і підказки часування, щоб підтримувати вдосконалення пізніше. Для зображень включіть нотатки походження та ліцензування, щоб деталі ліцензування були доступні редакторам. Цей підхід зменшує відтік під час оглядів, дозволяючи швидкі попередні перегляди для instagram і співпрацювальників. Якщо активи показують водяні знаки вірусним або логотипи бананом, замініть їх нейтральними плейсхолдерами і тримайте оригінали в окремому архіві для аудиту.
Ескізи та референси
Використовуйте передову підказку, щоб керувати візуальним напрямком ваших мультиплікаційних персонажів. Проведіть прохід розкриття, щоб перевірити пропорції та жести, збираючи референси. Маркуйте кожне зображення стислою підписом і детальною нотаткою про можливості (різноманітність поз, освітлення, текстура), щоб допомогти вдосконалити отримання послідовних результатів. Зберігайте зображення з надійних джерел з послідовними активами, і забезпечте доступність команді в системі. Будуйте лійки, що рухаються від перевірок ескізів до оглядів повної роздільної здатності, мінімізуючи відтік і прискорюючи ітерацію. Знати свій напрямок і тримайте нотатки під рукою, щоб покращувати точність з часом.
Аудіо та ліцензування
Для аудіо зберігайте стеми як WAV на 44.1 kHz / 16-bit і створюйте короткі петлі 5–10 секунд для швидких оглядів. Тримайте MP3-проксі для раундів зворотного зв'язку. Відстежуйте ліцензування та права використання для кожного файлу, і додайте короткий підпис, що описує настрій, темп і підказки часування. Забезпечте, щоб активи були доступні редакторам і аніматорам, і прикріпіть просту підказку, що описує, як аудіо повинно узгоджуватися з візуалами. Ця структура допомагає вам вдосконалити часування пізніше, зберігаючи чітку атрибуцію і уникаючи відтоку на пізніх етапах.
Дизайн персонажів та середовищ з параметрами стилю VEO 3
Почніть з конкретної бази: зафіксуйте одну референсну підказку для персонажів VEO 3 і іншу для середовищ, потім ітеруйте. Цей важливий крок створює джерело для послідовних форм, палітр і світних акцентів. Використовуйте цей фреймворк генерації, щоб зіставити, як правки до силуету, блоків кольору та освітлення поширюються через сцени. Тримайте фокус на практиках, які ви можете повторювати через кадри, як спільна конвенція називання для параметрів і спільне колесо кольорів. Введіть концепцію (концепції) рівнів сяйва та обробки країв рано, щоб переходи в стилі Wochen залишалися плавними.
Для персонажів визначте основний силует, мову очей і рота, і набір правил освітлення. Який настрій ви хочете – грайливий, героїчний чи загадковий – керує вагою лінії, кривизною та негативним простором. В межах цього встановіть провідну колірну сім'ю і tier сяйва, який ви застосовуєте до хайлайтів (світящихся). Чи можете ви зафіксувати текстуру з мінімальними мапами текстур, покладаючись на блоки затінення? Так: тримайте керівництво текстурою практичним, і прив'яжіть його до освітлення середовища, щоб персонаж відчувався закріпленим. Використовуйте практики, як тестові рендери на 3–5 кутах, і зберігайте успішні підказки в спільному файлі стилю .json, який ваша команда може повторно використовувати.
Для середовищ зафіксуйте висоту горизонту, щільність текстури та мову матеріалів (метал, скло, тканина) до малого набору пресетів. Встановіть стратегію палітри, узгоджену з підказками в стилі Gemini, щоб тримати тони гармонійними через сцени. В межах кожного кадру визначте, як відображення, туман і об'ємне світло взаємодіють з персонажами, щоб підтримувати візуальну coherentність. Дозвольте ефектам сяяти через сцену так, щоб персонажі читалися і сцена залишалася читабельною на різних пристроях. Цей підхід допомагає вам зрозуміти очікування від режисерів і письменників і зменшує переробку під час оглядів.
Щоб підтримувати імпульс, інтегруйте цикли зворотного зв'язку в ваш робочий процес: знімки підказок, швидкі нотатки про те, що змінилося, і підсумок, як ці зміни впливають на настрій і читабельність. Оновлення newsletter можуть зафіксувати уроки і надати швидку довідку для команди, щоб швидко узгоджувати (вашу команду) і тримати процес прозорим. Трактуючи концепції як джерело зусилля, ви створюєте повторюваний шлях від концепцій до фінальних кадрів, що прискорює створення і забезпечує послідовний стиль VEO 3 через ітерації.
| Параметр | Керівництво |
|---|---|
| Силует персонажа | Зафіксуйте сміливу базову форму, протестуйте на трьох кутах, застосовуйте rim glow обережно. Відстежуйте кривизну краю, щоб запобігти дивним силуетам у русі. |
| Освітлення персонажа | Використовуйте правило освітлення двох рівнів: ключове світло для форми, шар сяйва для акцентів (світящихся). Тримайте температуру кольору в вузькому діапазоні, щоб підтримувати згуртованість. |
| Колірна палітра | Прийміть первинну палітру і набір підтримуючих акцентів. Використовуйте блоки натхненні Gemini, щоб узгоджувати тони через кадри; коригуйте насиченість за настроєм сцени. |
| Текстура середовища | Обмежте складність текстури трьома станами: гладкий, середній, детальний. Прив'яжіть щільність текстури до відстані від камери, щоб зберегти продуктивність. |
| Освітлення середовища | Визначте напрямок сонячного світла і заповнення навколишнього. Додайте volumetric підказки, де потрібна глибина, щоб підтримувати персонажів у кадрі. |
| Настрій і тон | Документуйте одне речення на кадр, що описує задуманий відчуття (надійний, напружений, примхливий) і зіставте його з виборами освітлення, кольору та жестів. |
В межах цього фреймворку ви отримуєте стабільну базу, що підтримує швидку ітерацію і чітку комунікацію. Якщо рецензент відзначає відхилення в стилі, поверніться до вихідних підказок, скорегуйте обмеження колеса, і перезапустіть короткий набір тестів. Цей підхід узгоджує ваше розуміння очікувань з практичними виходами і тримає процес фокусованим на відчутних покращеннях, а не на невизначених вдосконаленнях.
Анімуйте з часовий шкалою: ключові кадри, easing та lip-sync
Почніть з чіткого плану ключових кадрів: провідна поза на 0с, вторинна поза близько 0.6с, і фінальна поза біля 1.2с для кліпу 1.5–2с. Прикріпіть кожну позу до 2–4 кадрів, щоб тримати рух читабельним, потім вдоскональте простори. Використовуйте ease-out для відправлень і ease-in для прибуттів; тримайте кінцівки читабельними з м'якими кривими і коротким моментом спокою після швидких рухів, щоб закріпити вагу.
Для lip-sync зіставте фонеми аудіо з visemes на часовий шкалі. Створіть базу viseme ключових кадрів кожні 3–4 кадри на 30fps (приблизно 100–140 мс) і скорегуйте, щоб відповідати пікам аудіо. Підтримуйте стабільний темп мови, щоб уникнути тремтіння; коли з'являється невідповідність, додайте коротке утримання рота, щоб сигналізувати напружену складову. Після чернетки відтворіть послідовність, щоб виявити відхилення; виявлені прогалини в часуванні підштовхуються малими приростами, а не перебудовуються з нуля.
Використовуйте підказки та промтов, щоб засіяти грубий рух для вашого мультиплікаційного персонажа. Згенеруйте кілька ітерацій варіантів і визначте, які стратегії доставляють найкраще узгодження з сценарієм такого. Прикріпіть аудіотекст (text) до проходу lip-sync і забезпечте, щоб ім'я та брендинг з'являлися в підписах. Для робочих процесів instagram експортуйте кліпи високої якості (high-quality) і розгляньте додатковий polish (extra). Ви зможете скорегувати rates (rates) і options (option), поки ітеруєте; подумайте, як аудиторія реагує, потім вдоскональте. Кілька проходів, все ще тонке налаштування, і критичні перевірки на читабельність дадуть сильніші результати – promt-driven підказки можуть розблокувати плавніше часування і природний вираз.
Інтегруйте аудіо, фокусоване на ASMR, та задовільні візуальні підказки
Почніть з фокусованої, низькооб'ємної ASMR аудіо-постелі і узгодьте її з мінімалістичними, задовільними візуальними підказками, що відображають on-screen рух. Використовуйте тонкі шепоти, м'яке постукування і ніжні текстури тканини, щільно синхронізовані з ключовими діями, такими як натискання кнопки чи моргання повіки. Ця пряма пара створює негайний тактильний резонанс для глядачів.
Покращений робочий процес дозволяє вам аналізувати зворотний зв'язок і вдосконалювати баланс між аудіо та рухом у data-driven циклі. В області звуку шаруйте базову ambiance, шепіт підказки і тонкі тактильні текстури; використовуйте кілька активів, узгоджених з кожною дією. Це допомагає розкривати патерни в відповідях користувачів і інформує рішення через текстові підказки, щоб тонко налаштувати часування та інтенсивність, щоб послідовність відчувалася природною.
Для візуалів створюйте заворажаючі підказки через поєднання м'якого освітлення, паралакс-руху (руху) і мікро-взаємодій. Використовуйте плавні криві easing, м'які зсуви кольору і закруглені кути, щоб посилювати аудіо-оповідь і тримати фокус на наступному жесті. Щоб зрозуміти, де приземлюється увага, узгодьте колір і рух з відповідною звуковою підказкою, забезпечуючи, щоб рух залишався coherentним.
Створюйте підказки, що описують очікувані реакції, і тестуйте їх, використовуючи передові ітерації. Запускайте питання та експерименти з кількома варіантами аудіо-текстур і візуалів, потім порівнюйте часування та враження, щоб максимізувати узгодження. Під час тестування відстежуйте кореляції між аудіо та рухом, щоб підтримувати кращі рішення і зменшувати цикли ітерації, доставляючи більш immersive досвід.
Доступність і безпека: підтримуйте послідовну гучність через доріжки і пропонуйте просту перемикачку, щоб скорегувати інтенсивність ASMR. Надавайте транскрипти для аудіо підказки і включайте клавіатурно-дружні контролери для пропуску та петлі. Якщо ви співпрацюєте з багатомовною командою, можете анотувати ключові підказки і синхронізувати їх з on-screen діями, щоб покращити розуміння і охоплення. Цей підхід допомагає розкривати нові аудиторії, тримаючи контент engaging і respectful.
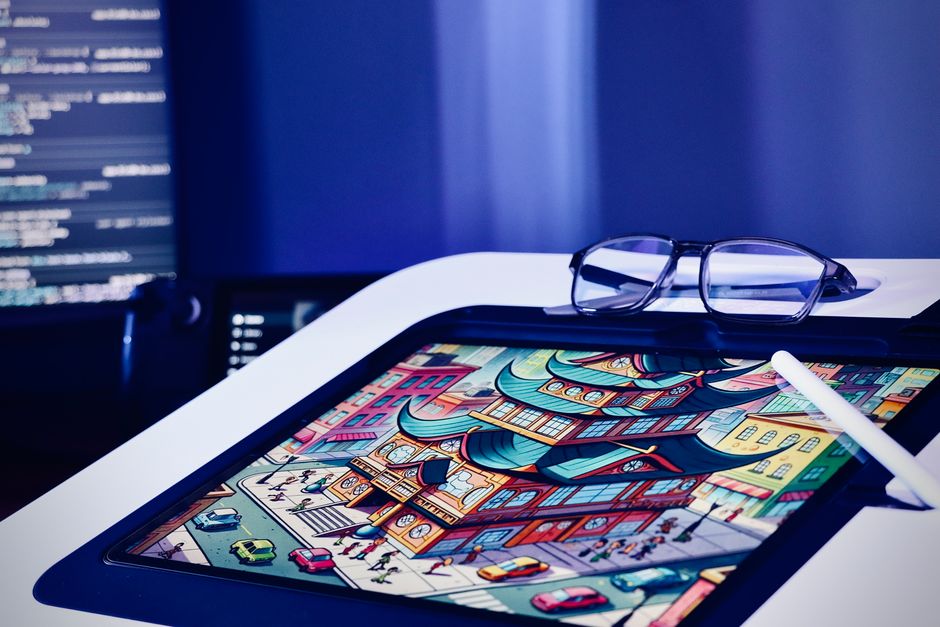
Рендерите, експортуйте та оптимізуйте для платформ і доступності
Експортуйте 1080p MP4 з H.264 і AAC аудіо, включіть точні підписи, і згенеруйте три варіанти (1080p, 720p, 480p), щоб охопити поля та бізнеси через платформи і живити відео через етапи. Цей підхід покращує швидкість завантаження, посилює якість виходу і відповідає очікуванням повертаючихся глядачів. Використовуйте двоетапне кодування, щоб зберегти якість зображення, тримаючи розміри файлів керованими; для довгоформатних відео налаштуйте бітрейти за етапом: 6–8 Mbps для 1080p, 3–5 Mbps для 720p, і 1.5–2 Mbps для 480p. Забезпечте, щоб рівні голосу залишалися збалансованими з music bed для зрозуміливості і послідовної швидкості. Для генерації та workflow generation автоматизуйте підписи, thumbnails і варіанти мови, щоб прискорити вихід і зменшити ручні кроки. Ви можете налаштувати пресети до ваших полів і бізнесів; цей базовий сетап пропонує найкращий вихід і цінність для довгих і коротких відео, допомагаючи успіху через платформи.
Формати, готові до платформ, та пакети активів
Надавайте платформо-специфічні варіанти в одному пакеті доставки: включайте доріжки підписів SRT або WebVTT, 16:9 майстер, 9:16 вертикальний зріз для stories, і 1:1 квадратний зріз для feeds. Підтримуйте послідовне називання файлів і простий маніфест, щоб редактори та менеджери CMS могли швидко інгестувати. Доставляйте thumbnails як 1280×720 PNG або JPEG на під 200 KB, щоб зменшити час завантаження, і тримайте активи зображення image в чіткій ієрархії в папці проекту. Для базового брендингу тримайте єдиний колірний профіль (Rec. 709) і універсальний стек шрифтів, щоб забезпечити послідовність зображення через середовища і очікування.
Доступність, тестування та QA
Перевірте, чи підписи узгоджуються з мовленням і надавайте транскрипти для довгих відео; увімкніть доріжки аудіо-опису, де потрібно, для візуально обмежених аудиторій. Тестуйте відтворення на мобільному, десктопі та smart TV, перевіряючи швидкість, затримку та sync через платформи. Включіть клавіатурно-дружню навігацію для будь-яких on-page плеєрів, і підтвердіть, що контраст кольору відповідає рекомендаціям доступності. Записуйте метрики виходу, такі як час кодування, розмір файлу та послідовність бітрейту, щоб вдосконалити pipelines і підтримувати довгострокову цінність для користувачів, які покладаються на чіткі, надійні візуали.
📚 Більше про генерацію AI та підказки
- Як створити вірусні AI-відео з Google Veo 3 та Filmora - Покроковий посібник
- Створіть високоякісні AI-відео з Google Veo 3 - Практичний посібник
- Як використовувати Veo 3 для створення Powtoon-відео - Покроковий посібник
- Як використовувати Veo 3 для створення висококонверсійних продуктових відео - Покроковий посібник
- Як генерувати відеокліпи зі звуком, використовуючи Veo 3 у Google Vids - Покроковий посібник
Ready to leverage AI for your business?
Book a free strategy call — no strings attached.


